Have you ever wondered how much time does it take to apply snow to all of the textures in your game? Probably a lot of times. We’d like to show you how to create an Image Effect (screen-space shader) that will immediately change the season of your scene in Unity.

How does it work?
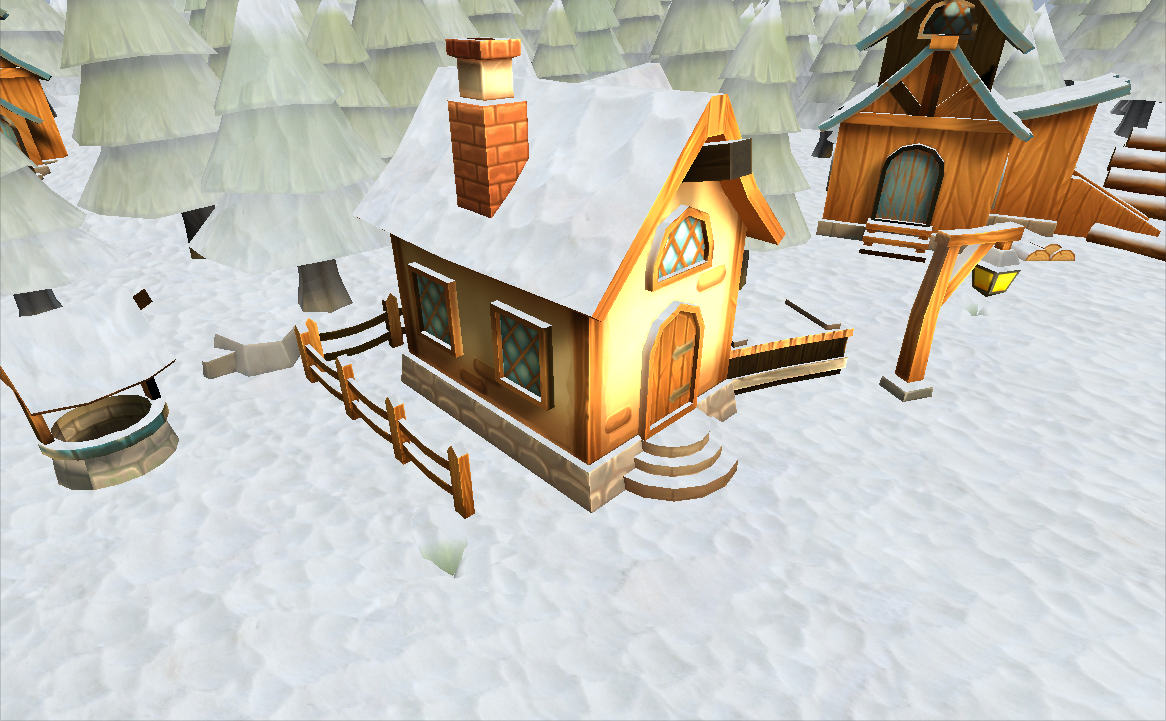
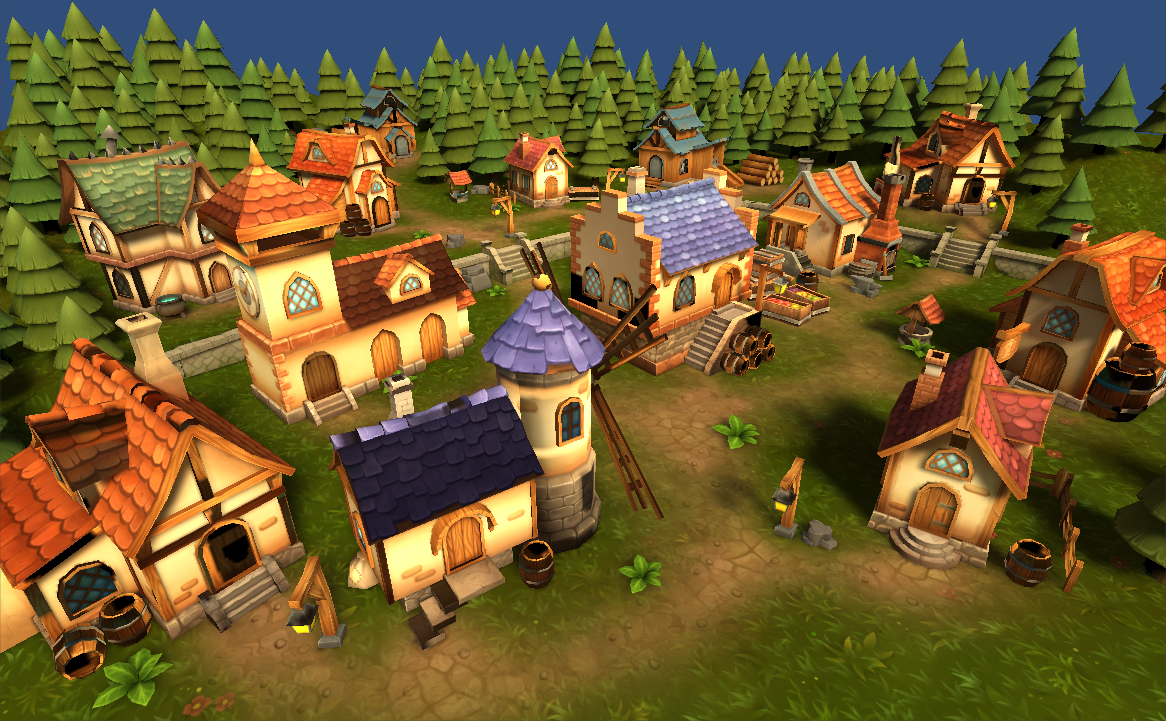
In the images above you can see two screenshots presenting the same scene. The only difference is that in the second one I enabled snow effect on the camera. No changes to any of the textures has been made. How could that be?
The theory is really simple. The assumption is that there should be a snow whenever a rendered pixel’s normal is facing upwards (ground, roofs, etc.) Also there should be a gentle transition between a snow texture and original texture if pixel’s normal is facing any other direction (pine trees, walls).
Getting the required data
For presented effect to work it requires at least two things:
- Rendering path set to deferred (For some reason I couldn’t get forward rendering to work correctly with this effect. The depth shader was just rendered incorrectly. If you have any idea why that could be, please leave a message in the comments section.)
- Camera.depthTextureMode set to DepthNormals
Since the second option can be easily set by the image effect script itself, the first option can cause a problem if your game is already using a forward rendering path.
Setting Camera.depthTextureMode to DepthNormals will allow us to read screen depth (how far pixels are located from the camera) and normals (facing direction).
Now if you’ve never created an Image Effect before, you should know that these are build from at least one script and at least one shader. Usually this shader instead of rendering 3D object, renders full-screen image out of given input data. In our case the input data is an image rendered by the camera and some properties set up by the user.
using UnityEngine;
using System.Collections;

[ExecuteInEditMode]
public class ScreenSpaceSnow : MonoBehaviour
{

	public Texture2D SnowTexture;

	public Color SnowColor = Color.white;

	public float SnowTextureScale = 0.1f;

	[Range(0, 1)]
	public float BottomThreshold = 0f;
	[Range(0, 1)]
	public float TopThreshold = 1f;

	private Material _material;

	void OnEnable()
	{
		// dynamically create a material that will use our shader
		_material = new Material(Shader.Find("TKoU/ScreenSpaceSnow"));

		// tell the camera to render depth and normals
		GetComponent<Camera>().depthTextureMode |= DepthTextureMode.DepthNormals;
	}

	void OnRenderImage(RenderTexture src, RenderTexture dest)
	{
		// set shader properties
		_material.SetMatrix("_CamToWorld", GetComponent<Camera>().cameraToWorldMatrix);
		_material.SetColor("_SnowColor", SnowColor);
		_material.SetFloat("_BottomThreshold", BottomThreshold);
		_material.SetFloat("_TopThreshold", TopThreshold);
		_material.SetTexture("_SnowTex", SnowTexture);
		_material.SetFloat("_SnowTexScale", SnowTextureScale);

		// execute the shader on input texture (src) and write to output (dest)
		Graphics.Blit(src, dest, _material);
	}
}
It’s only the basic setup, it will not generate a snow for you. Now the real fun begins…
The shader
Our snow shader should be an unlit shader – we don’t want to apply any light information to it since on screen-space there’s no light. Here’s the basic template:
Shader "TKoU/ScreenSpaceSnow"
{
	Properties
	{
		_MainTex ("Texture", 2D) = "white" {}
	}
	SubShader
	{
		// No culling or depth
		Cull Off ZWrite Off ZTest Always

		Pass
		{
			CGPROGRAM
			#pragma vertex vert
			#pragma fragment frag

			#include "UnityCG.cginc"

			struct appdata
			{
				float4 vertex : POSITION;
				float2 uv : TEXCOORD0;
			};

			struct v2f
			{
				float2 uv : TEXCOORD0;
				float4 vertex : SV_POSITION;
			};

			v2f vert (appdata v)
			{
				v2f o;
				o.vertex = mul(UNITY_MATRIX_MVP, v.vertex);
				o.uv = v.uv;
				return o;
			}

			fixed4 frag (v2f i) : SV_Target
			{
				// the magic happens here
			}
			ENDCG
		}
	}
}
Note that if you create a new unlit unity shader (Create->Shader->Unlit Shader) you get mostly the same code.
Let’s now focus only on the important part – the fragment shader. First, we need to capture all the data passed by ScreenSpaceSnow script:
sampler2D _MainTex;
sampler2D _CameraDepthNormalsTexture;
float4x4 _CamToWorld;

sampler2D _SnowTex;
float _SnowTexScale;

half4 _SnowColor;

fixed _BottomThreshold;
fixed _TopThreshold;


half4 frag (v2f i) : SV_Target
{

}
Don’t worry if you don’t know why we need all this data yet. I will explain it in detail in a moment.
Finding out where to snow
As I explained before, we’d like to put the snow on surfaces that are facing upwards. Since we’re set up on the camera that is set to generate depth-normals texture, now we are able to access it. For this case there is
sampler2D _CameraDepthNormalsTexture;
in the code. Why is it called that way? You can learn about it in Unity documentation:
Depth textures are available for sampling in shaders as global shader properties. By declaring a sampler called
_CameraDepthTextureyou will be able to sample the main depth texture for the camera.
_CameraDepthTexturealways refers to the camera’s primary depth texture.
Now let’s start with getting the normal:
half4 frag (v2f i) : SV_Target
{
	half3 normal;
	float depth;

	DecodeDepthNormal(tex2D(_CameraDepthNormalsTexture, i.uv), depth, normal);
	normal = mul( (float3x3)_CamToWorld, normal);

	return half4(normal, 1);
}
Unity documentation says that depth and normals are packed in 16 bits each. In order to unpack it, we need to call DecodeDepthNormal as above seen above.
Normals retrieved in this way are camera-space normals. That means that if we rotate the camera then normals’ facing will also change. We don’t want that, and that’s why we have to multiply it by _CamToWorld matrix set in the script before. It will convert normals from camera to world coordinates so they won’t depend on camera’s perspective no more.
In order for shader to compile it has to return something, so I set up the return statement as seen above. To see if our calculations are correct it’s a good idea to preview the result.
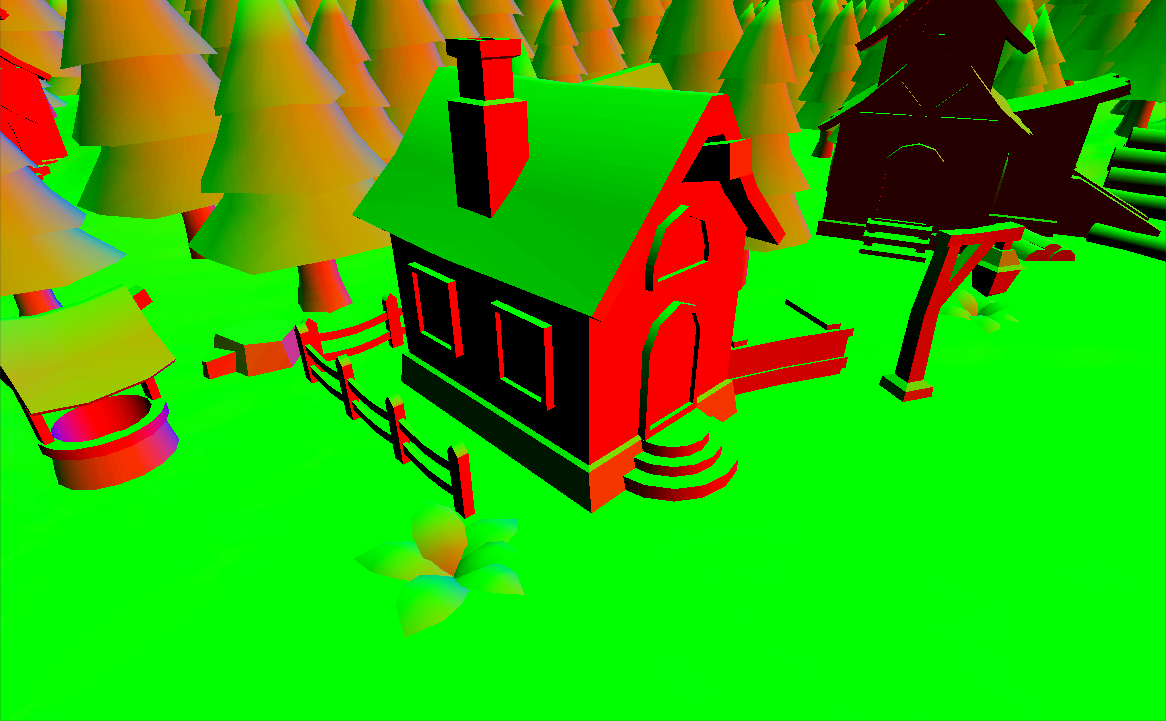
We’re rendering this as RGB. In Unity Y is facing the zenith by default. That means that green color is showing the value of Y coordinate. So far, so good!
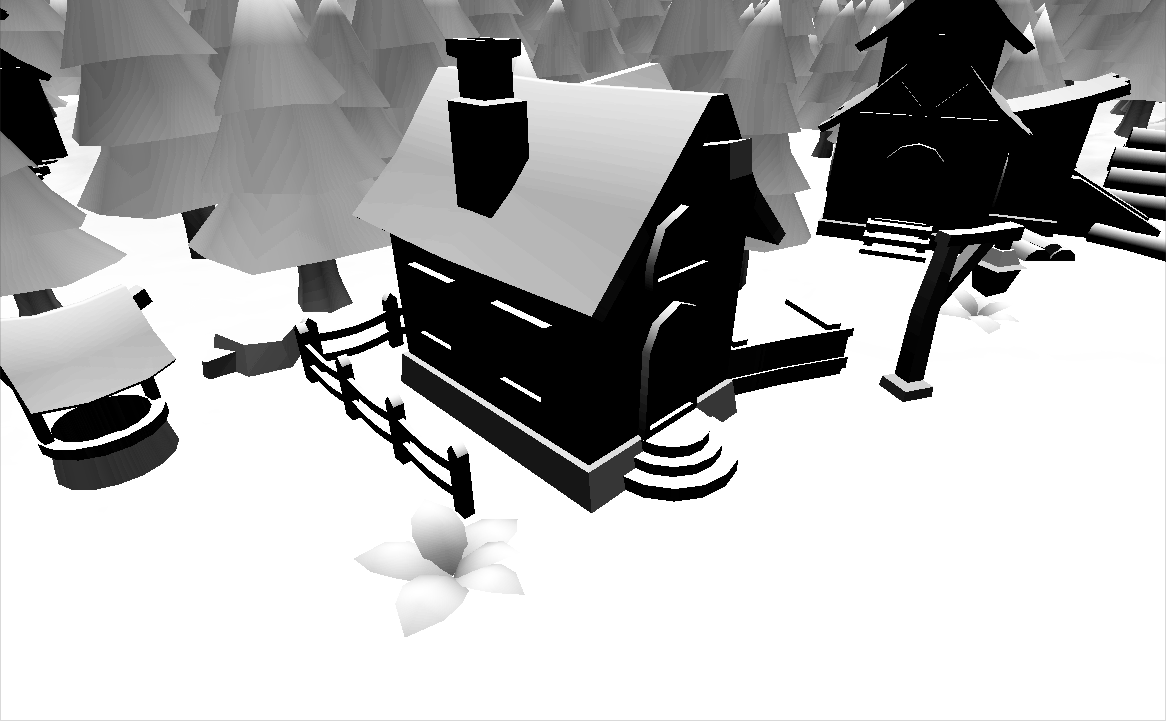
Now let’s convert it to snow amount factor.
half4 frag (v2f i) : SV_Target
{
	half3 normal;
	float depth;

	DecodeDepthNormal(tex2D(_CameraDepthNormalsTexture, i.uv), depth, normal);
	normal = mul( (float3x3)_CamToWorld, normal);

	half snowAmount = normal.g;
	half scale = (_BottomThreshold + 1 - _TopThreshold) / 1 + 1;
	snowAmount = saturate( (snowAmount - _BottomThreshold) * scale);

	return half4(snowAmount, snowAmount, snowAmount, 1);
}
We should be using the G channel, of course. Now, this may be enough, but I like to push it a little further to be able to configure bottom and top threshold of the snowy area. It will allow to fine-tune how much snow there should be on the scene.
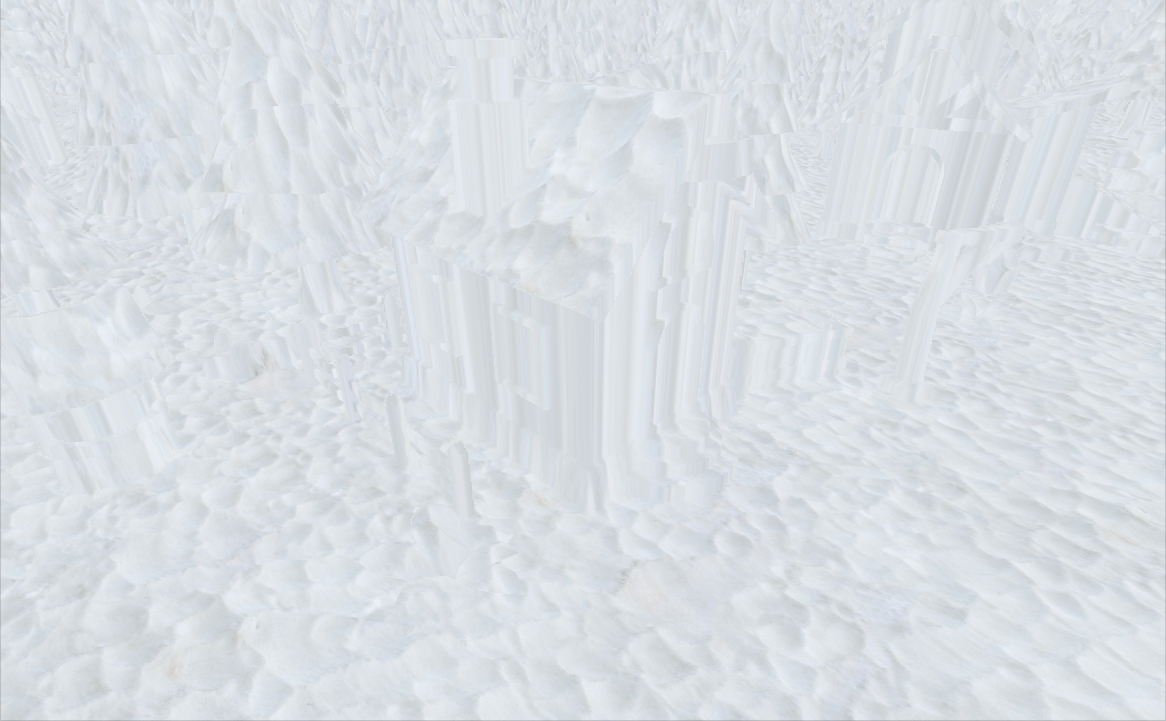
Snow texture
Snow may not look real without a texture. This is the most difficult part – how to apply a texture on 3D objects if you have only a 2D image (we’re working on screen-space, remember)? One way is to find out the pixel’s world position. Then we can use X and Z world coordinates as texture coordinates.
half4 frag (v2f i) : SV_Target
{
	half3 normal;
	float depth;

	DecodeDepthNormal(tex2D(_CameraDepthNormalsTexture, i.uv), depth, normal);
	normal = mul( (float3x3)_CamToWorld, normal);

	// find out snow amount
	half snowAmount = normal.g;
	half scale = (_BottomThreshold + 1 - _TopThreshold) / 1 + 1;
	snowAmount = saturate( (snowAmount - _BottomThreshold) * scale);

	// find out snow color
	float2 p11_22 = float2(unity_CameraProjection._11, unity_CameraProjection._22);
	float3 vpos = float3( (i.uv * 2 - 1) / p11_22, -1) * depth;
	float4 wpos = mul(_CamToWorld, float4(vpos, 1));
	wpos += float4(_WorldSpaceCameraPos, 0) / _ProjectionParams.z;

	half3 snowColor = tex2D(_SnowTex, wpos.xz * _SnowTexScale * _ProjectionParams.z) * _SnowColor;

	return half4(snowColor, 1);
}
Now here’s some math that is not a subject of this article. All you need to know is that vpos is a viewport position, wpos is a world position received by multiplying _CamToWorld matrix by viewport position and it’s converted to a valid world position by dividing by the far plane (_ProjectionParams.z). Finally, we’re calculating the snow color using XZ coordinates multiples by _SnowTexScale configurable parameter and far plane to get sane value. Phew…
Merging it!
It’s time to finally merge it all together!
half4 frag (v2f i) : SV_Target
{
	half3 normal;
	float depth;

	DecodeDepthNormal(tex2D(_CameraDepthNormalsTexture, i.uv), depth, normal);
	normal = mul( (float3x3)_CamToWorld, normal);

	// find out snow amount
	half snowAmount = normal.g;
	half scale = (_BottomThreshold + 1 - _TopThreshold) / 1 + 1;
	snowAmount = saturate( (snowAmount - _BottomThreshold) * scale);

	// find out snow color
	float2 p11_22 = float2(unity_CameraProjection._11, unity_CameraProjection._22);
	float3 vpos = float3( (i.uv * 2 - 1) / p11_22, -1) * depth;
	float4 wpos = mul(_CamToWorld, float4(vpos, 1));
	wpos += float4(_WorldSpaceCameraPos, 0) / _ProjectionParams.z;

	wpos *= _SnowTexScale * _ProjectionParams.z;
	half4 snowColor = tex2D(_SnowTex, wpos.xz) * _SnowColor;

	// get color and lerp to snow texture
	half4 col = tex2D(_MainTex, i.uv);
	return lerp(col, snowColor, snowAmount);
}
Here we’re getting the original color and lerping from it to snowColor using snowAmount.
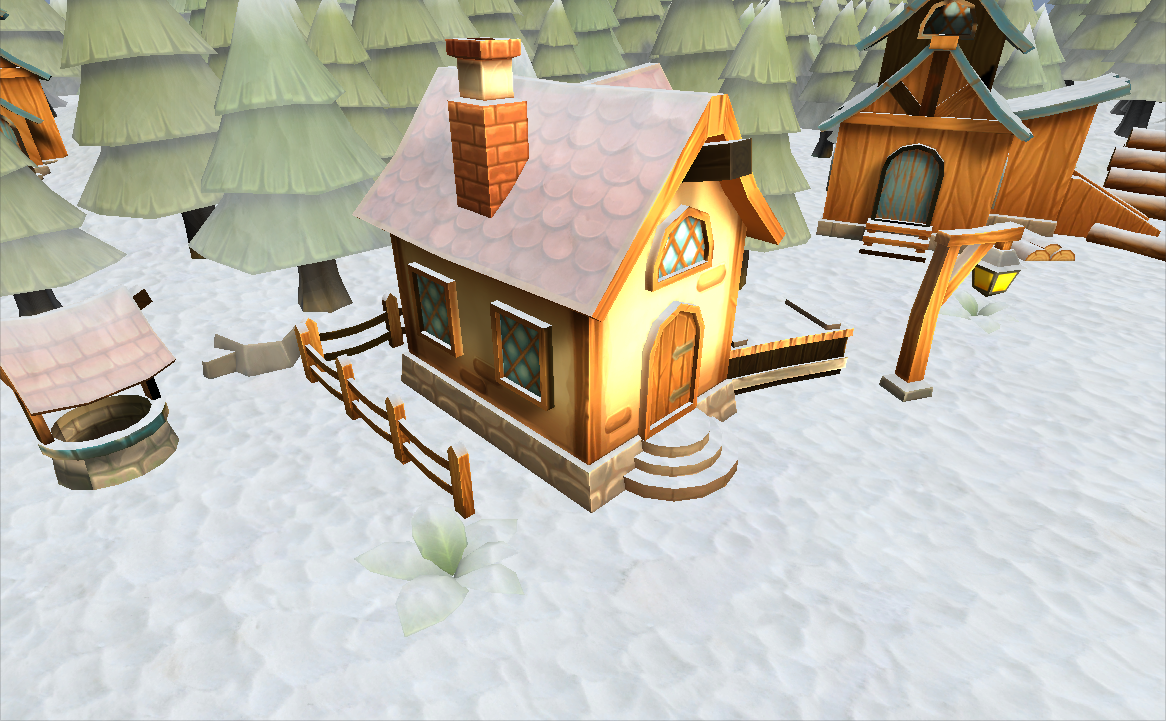
The final touch: let’s set _TopThreshold value to 0.6:
Voila!
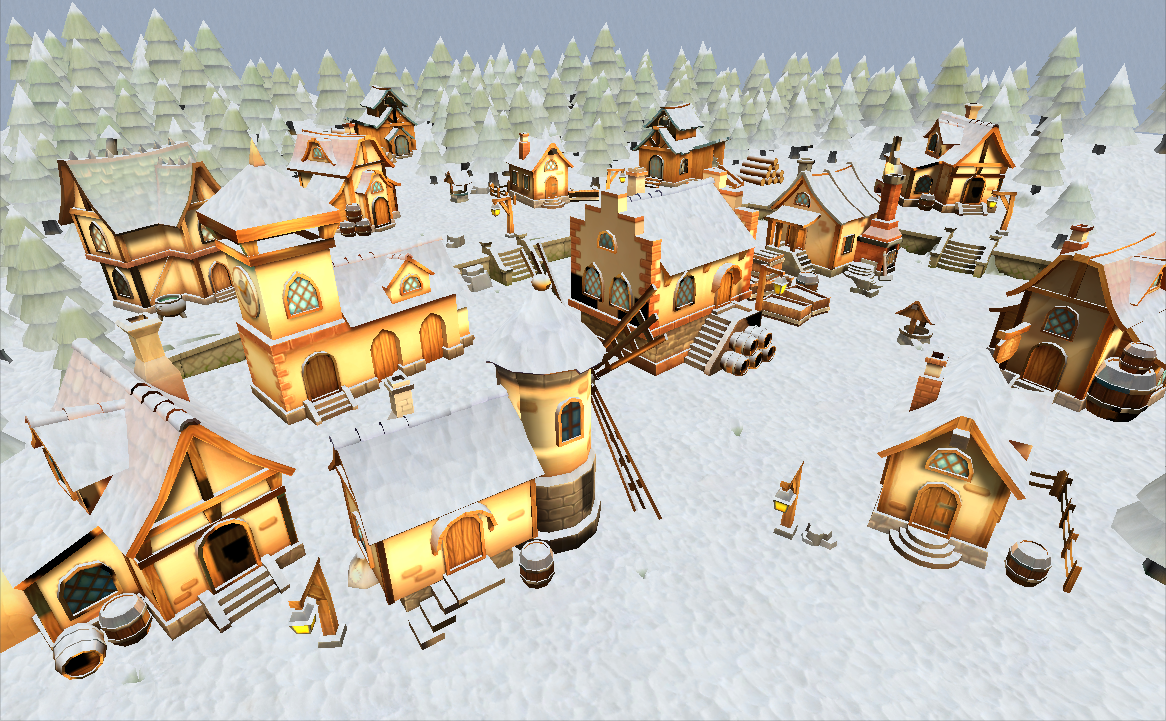
Summary
Here’s a full scene result. Looking nice?
Feel free to download the shader here and use it in your project!
Scene that has been used as the example in this article comes from Lowpoly Township Set. Inspired by this particular redditor.