How to achieve realistic results?
In a previous post, I was explaining what Lit shader is and the features that it provides. Today I will show you how to work with this shader and other new features announced with HDRP.
If we want to create a realistic scene we need to create source of reflections in our scene. The best option is to set environment around our target object or we can use HDRi map which simulates environment lights and reflection. I’m using a free one from https://hdrihaven.com to get some urban environmental lights on a 3D model.
I found a high poly model of a car. Due to visualization purposes of this post, the model is not optimized for games but you can apply the same setting to game ready models.
Floor is made from simple plane and texture set from https://texturehaven.com
Scene that I prepared for this tutorial contains:
- High poly car model
- Ground plane
- HDRi map (8k)
- Directional light
- Reflection probe
- Volume settings
- Post-process Volume
When you have set your assets in the scene, let’s start with adjusting Volume Settings, the feature within HDRP, where we adjust our Visual Environment. Volume component cover shadow settings is something that I recommend to try on your own because values will be different with your environment.
As I mentioned, We should set HDRi map to the right input in component. That will affect the entire scene and it will replace a skybox.

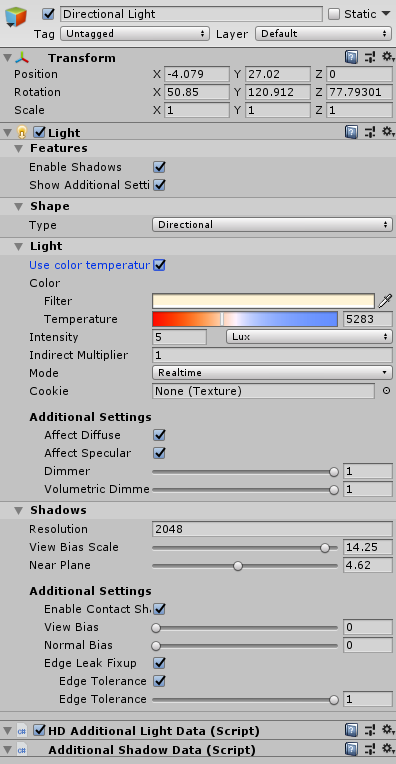
Also, let’s set directional light.
Check “use color temperature” to get values similar to real world ones and adjust temperature to match your concept.
Now it’s time to set materials to a car model. I will mainly focus on the body of the car, chrome wheels, and windows.
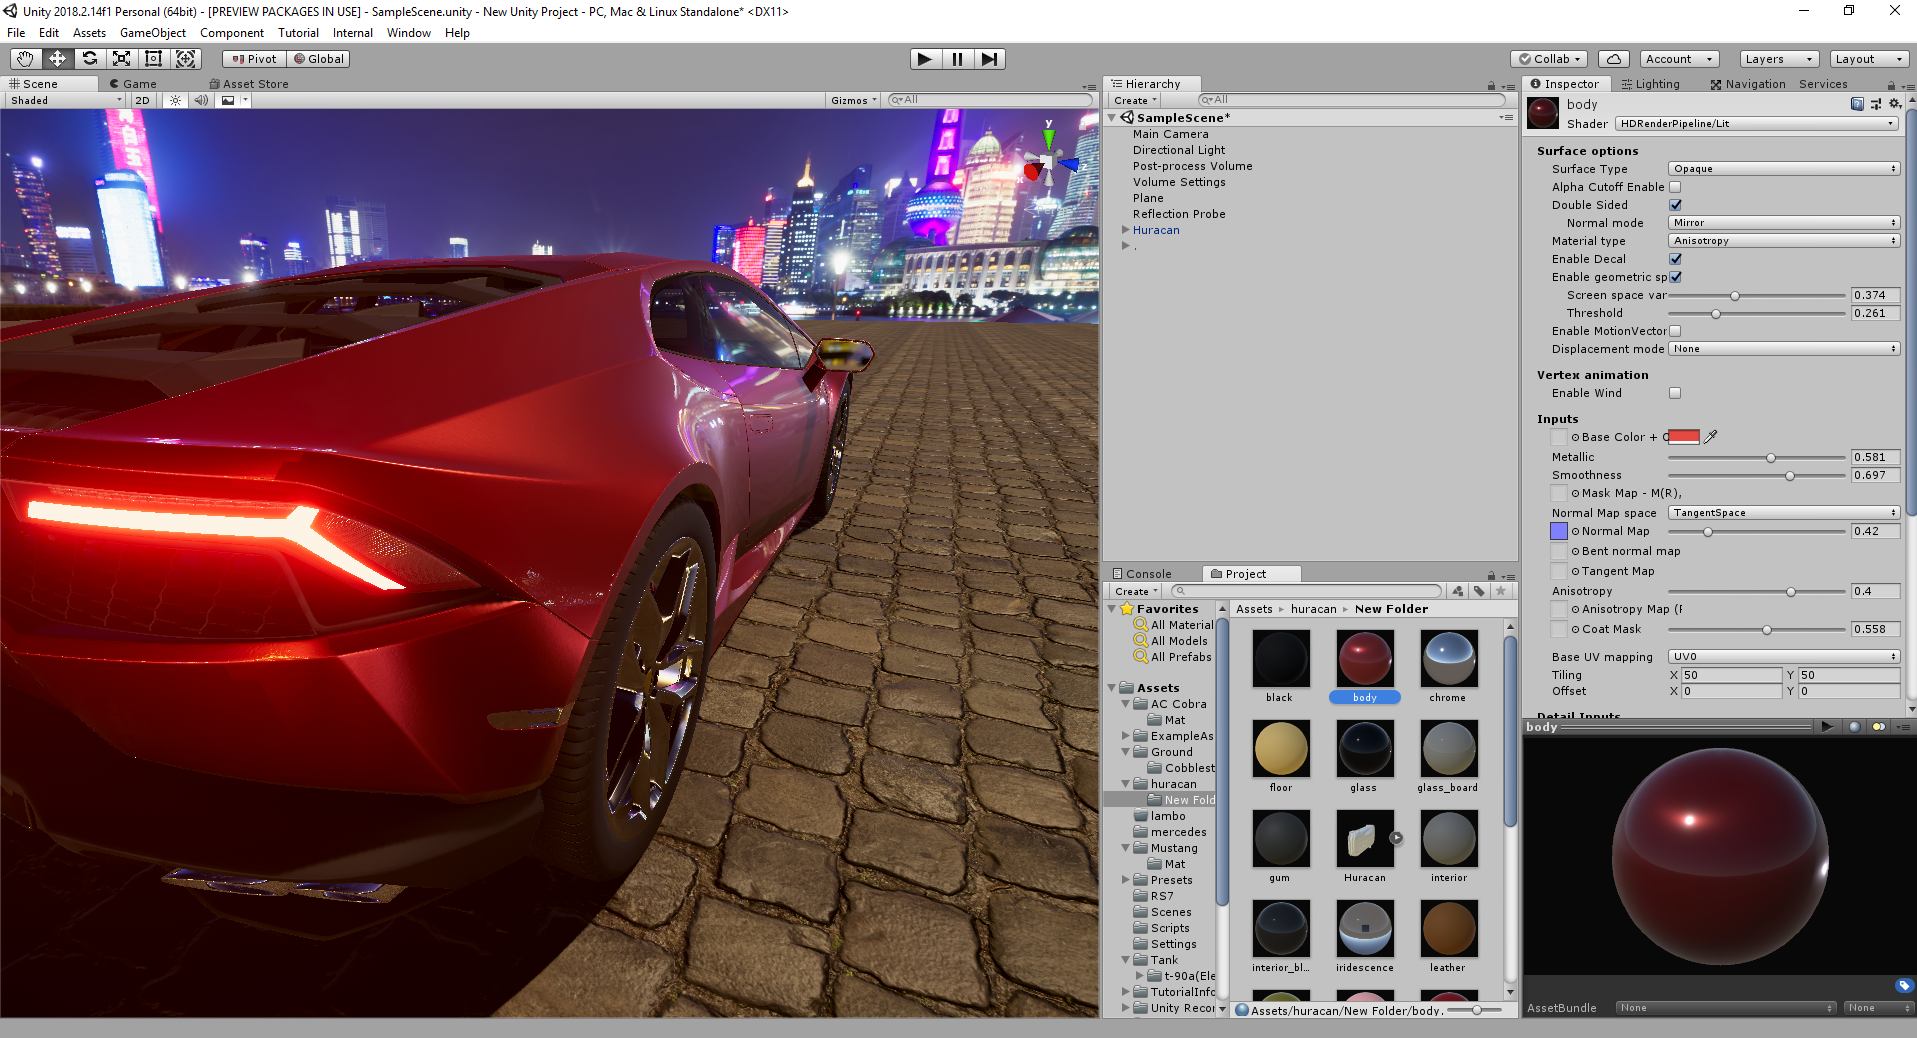
Starting with car paint, I choose Material type “Anisotropy” to distort reflection on a model. I don’t want to overuse this effect, just make it subtle.
Then I choose Base Color and adjust Metallic and Smoothness. I want to make the best proportion between these two values which simulate metal with paint on it.
These values depend on the surface and what we want to create, so set properties as you like and then iterate them to find the best setting. Make sure you don’t make it too shiny or too mat.
I added noise Normal Map to material because I felt that reflections are too flat. Normal Map gives a small detail that distorts reflection. I also lower the strength of Normal Map and increase Tiling, because this effect should be extremely subtle.
One thing that is left in the body is a Coat Mask. I don’t make any textures, just set value to improve reflections.
Chrome surface is much easier to create but this material is suitable only for details on a model such as wheels or exhaust pipes.
Creating Chrome surface just sets Metallic and Smoothness parameters to values close to 1.
Here is my setup of Chrome material and screenshots with two different values of Smoothness. I advise you to look for values little above 1, but it really depends on the purpose of your material.


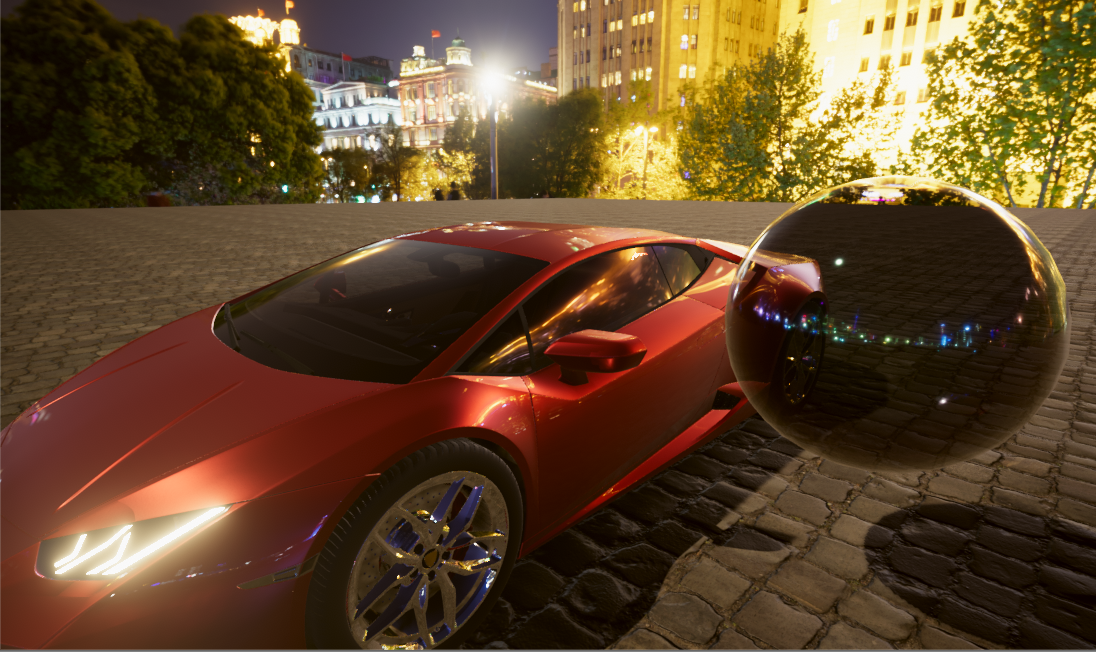
Last material I’m gonna cover is the Glass material.
For purpose of this, I created a pretty simple black glass material with high reflections. For a car model where all windows are more/less flat refraction will look weird so when you creating flat windows don’t go for that kind of effect, just make a Normal map with a detail you looking for to get distortion effect.
Iridescence will be barely visible on flat surfaces but it will give us some shiny detail on top of the glass surface.
Conclusion
In 2018 Unity has made a huge step into realistic rendering and gave us tools that are powerful and customizable. New HD shaders come with features similar to classic render engines so that artists and developers have an easier way to achieve the same quality in real time. Lit shader is extremely flexible and easy to use, which makes it a very useful addition to Unity. With new tools now available in Unity, we can enter an entire new level of visual design quality. It can help us achieve better results not only in visualizations but also in games, which we love!