Today we will cover creating custom Unity editor windows. They can be used in many different ways. Most probably you know them from 3rd party assets. Even if you’re not an asset developer, creating custom windows may help you greatly with your game development!
One of good examples of how the custom Unity editor window may be used is an implementation of in-editor cheat subsystem. Some time ago we created a cheat subsystem that is working within the actual game. Implementing some cheats using the editor windows has one significant advantage – it’s much, much easier to write and use! Read this article further on to learn how easy it can be!
Creating an editor window
First, we have to create a new window. In order to do that, we need a new class inside Editor folder (see Special Folder Names).
![]()
Then start with code like this:
using UnityEditor;
using UnityEngine;

public class CheatsWindow : EditorWindow
{
    [MenuItem("My Game/Cheats")]
    public static void ShowWindow()
    {
        GetWindow<CheatsWindow>(false, "Cheats", true);
    }
}
Let’s explain:
- At line 4 we have to make CheatsWindow class, a derived type of EditorWindow class
- At line 6 we’re telling that the following method should have a Unity menu entry. It will be available at My Game/Cheats in this case.
- At line 7 there’s a static method to create a window.
- At line 9 a window is created (if does not exist) or focused (if exists) – see GetWindow documentation.
When the Unity compiles this code, you will notice a new menu entry.

Try clicking on it, and a new empty editor window will appear!
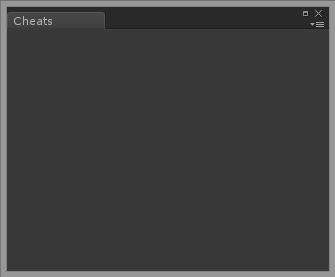
Now let’s try to fill it with some content!
Adding content
To add content to our new editor window we have to implement OnGUI method just like for MonoBehaviour classes. The only difference is that you now have the access to EditorGUI and EditorGUILayout classes, but still you can use GUI and GUILayout classes as well! Let’s try it.
    void OnGUI()
    {
        EditorGUILayout.Toggle("Mute All Sounds", false);
        EditorGUILayout.IntField("Player Lifes", 3);
        EditorGUILayout.TextField("Player Two Name", "John");
    }
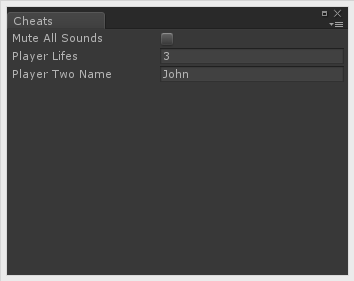
That was easy! But as you might have noticed, you won’t be able to edit the data just then. GUI functions are returning a new value as a parameter and a current value should be passed as a second parameter to make it work. Let’s implement new Cheats class. This one will be located outside the Editor directory so the game script will be able to access it. Watch out, this is a big one!
#if UNITY_EDITOR
using UnityEditor;
#endif

public class Cheats
{
    public static bool MuteAllSounds
    {
        get
        {
#if UNITY_EDITOR
            return EditorPrefs.GetBool("MuteAllSounds", false);
#else
            return false;
#endif
        }

        set
        {
#if UNITY_EDITOR
            EditorPrefs.SetBool("MuteAllSounds", value);
#endif
        }
    }

    public static int PlayerLifes
    {
        get
        {
#if UNITY_EDITOR
            return EditorPrefs.GetInt("PlayerLifes", 3);
#else
            return false;
#endif
        }

        set
        {
#if UNITY_EDITOR
            EditorPrefs.SetInt("PlayerLifes", value);
#endif
        }
    }

    public static string PlayerTwoName
    {
        get
        {
#if UNITY_EDITOR
            return EditorPrefs.GetString("PlayerTwoName", "John");
#else
            return false;
#endif
        }

        set
        {
#if UNITY_EDITOR
            EditorPrefs.SetString("PlayerTwoName", value);
#endif
        }
    }
}
OK, let’s split it to smaller parts.
#if UNITY_EDITOR
using UnityEditor;
#endif
#if and #endif are so-called preprocessor directives. The #if UNITY_EDITOR evaluates to true if UNITY_EDITOR symbol is defined. The Unity defines UNITY_EDITOR symbols when you’re working in the editor, but not when you’re building your game to the target platform. That way using UnityEditor; will be stripped-out when you build your game (see Platform Dependent Compilation). And this is necessary, because the Unity compiler will yield an error if you try to use the UnityEditor namespace inside game scripts without any environment check.
Next, we have a property:
    public static bool MuteAllSounds
    {
And the getter:
        get
        {
#if UNITY_EDITOR
            return EditorPrefs.GetBool("MuteAllSounds", false);
#else
            return false;
#endif
        }
This is working very similar to previous preprocessor construction, but here you also have an #else directive. The #else code block will be included if the #if condition evaluates to false. Simply talking, inside the Unity editor this code will get boolean value form EditorPrefs, and outside the Unity it will always return false.
        set
        {
#if UNITY_EDITOR
            EditorPrefs.SetBool("MuteAllSounds", value);
#endif
        }
Setter is very similar to getter, but here we don’t need an #else directive, because we don’t want it to set anything outside the Unity editor (there will be nothing to set it).
The rest of the file consists of two more properties with similar construction.
Now let’s modify our window code:
    void OnGUI()
    {
        Cheats.MuteAllSounds =
            EditorGUILayout.Toggle("Mute All Sounds", Cheats.MuteAllSounds);
        Cheats.PlayerLifes =
            EditorGUILayout.IntField("Player Lifes", Cheats.PlayerLifes);
        Cheats.PlayerTwoName =
            EditorGUILayout.TextField("Player Two Name", Cheats.PlayerTwoName);
    }
As you can see, since we made our cheats data this way, it’s really easy to read and save the persistent data. Now, even if you restart your Unity editor, the cheats will be still in effect!
Adding buttons
How about a reset button? That’s easy!
        if (GUILayout.Button("Reset"))
        {
            Cheats.MuteAllSounds = false;
            Cheats.PlayerLifes = 4;
            Cheats.PlayerTwoName = "John";
        }
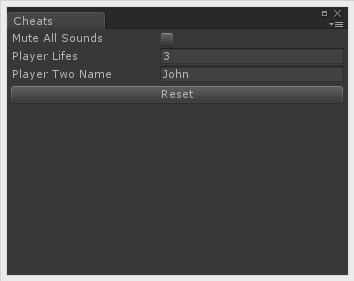
But by default the reset button is quite big and located right below other fields. This makes our window look kind of unfinished. Let’s fix that using GUILayout.FlexibleSpace() before rendering our button.
        GUILayout.FlexibleSpace();

        if (GUILayout.Button("Reset"))
        {
            Cheats.MuteAllSounds = false;
            Cheats.PlayerLifes = 4;
            Cheats.PlayerTwoName = "John";
        }
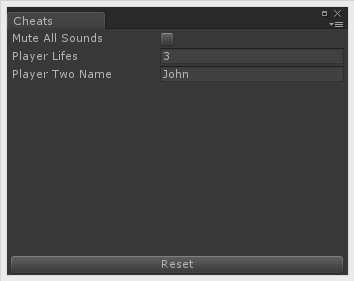
Now if you want your button to be smaller you have to play with EditorGUILayout.BeginHorizontal() and flexible space.
        GUILayout.FlexibleSpace();

        EditorGUILayout.BeginHorizontal();
        GUILayout.FlexibleSpace();
        if (GUILayout.Button("Reset"))
        {
            Cheats.MuteAllSounds = false;
            Cheats.PlayerLifes = 4;
            Cheats.PlayerTwoName = "John";
        }
        EditorGUILayout.EndHorizontal();
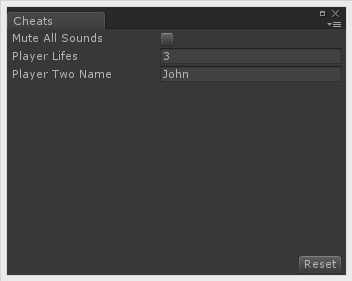
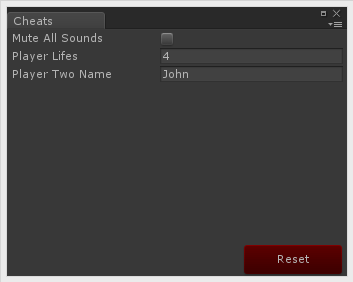
And maybe a final touch.
        GUI.backgroundColor = Color.red;

        if (GUILayout.Button("Reset", GUILayout.Width(100), GUILayout.Height(30)))
        {
            Cheats.MuteAllSounds = false;
            Cheats.PlayerLifes = 4;
            Cheats.PlayerTwoName = "John";
        }
The package
As always you can download the unitypackage containing scripts described above. Feel free to download, modify and adjust it to your own needs!
