Introduction
At the end of October on the Unity Developer conference Unite LA, Unity team presented their new, improved prefab workflow. Full presentation about the new way to work with prefabs can be seen here: https://www.youtube.com/watch?v=AqAVJiU2MYs. There are four great features that can improve development of Unity projects:
- Prefab Mode
- Nesting Prefabs
- Prefab Variant
- Improved Apply
It’s good to get familiar with them because they will make your development much easier.
New prefabs system and many new features were released with Unity version 2018.3.0.
All release notes can be found here: https://unity3d.com/unity/whats-new/unity-2018.3.0.
Let’s check what’s new in this version according to prefabs!
New hierarchy look
When you open a new Unity version with some prefabs on the scene you can see new hierarchy view. There are a few, but very useful changes that will help with working with prefabs.

As you can see there are some new icons and old gray/blue texts. Let’s explain each element:
- Icon
- Gray cube icon – game object
- Blue cube icon – prefab (prefab root)
- Blue cube icon with arrows – prefab variant
- Text
- Gray text – game object that is just a game object on its own
- Blue text – game object that is part of the prefab
It’s very easy and intuitive and for sure it improves prefabs workflow.
Nesting prefabs
Did you ever want to create prefab inside another prefab? Now you can do it! Nesting allows you to have some base prefabs (eg. for header texts) and put them inside some templates (eg. menu or card prefab).
Previously there was no possibility of nesting prefabs. After adding one prefab to another and using Apply functionality, the inside prefab became part of the outside prefab structure. Now you can have prefabs in prefab and edit them independently. You can choose if you apply changes to current prefab (nested) or to root prefab. More about applying changes will be in the next chapter.
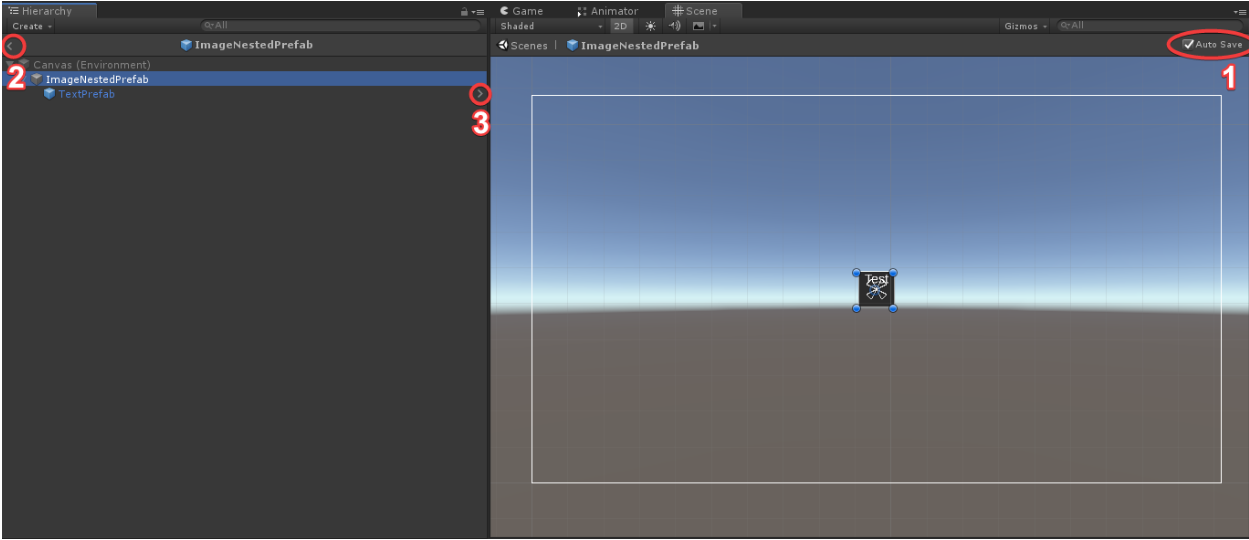
Let’s create some nested prefab. At first, you have to create normal prefab. In this example, it will be TextMeshProUGUI object. Then create a new image object, and place text prefab under the image object. In the end just create prefab from image object (just like normal prefab by drag and drop game object to Prefabs folder). Congratulations! You created first nested prefab:

As you can see in the hierarchy there are two root prefabs. Each one is true prefab and one is inside another. They can be edited as separate prefabs for example in prefab mode.
Prefab mode
It is a safe space where you can easily edit prefab. Previously prefabs were edited in scene view and sometimes changes were applied by accident. Now you can open edit view only for prefab.
To enter prefab mode just click the little right arrow icon next to the prefab name in the hierarchy:

Or use the open button in the inspector:

After that, you are in a safe environment where you can easily work on your selected prefab:
In hierarchy and on the scene view there is only selected prefab so it’s easy to focus on what you are editing.
- By default, saving is set to autosave mode. In this mode every change you make, it instantly applies to prefab. You can deselect this option if you don’t want your changes to be saved automatically.
- If you don’t want to save changes you can easily exit from prefab mode and choose discard changes option in the prompt message by clicking left arrow icon in the hierarchy.
- And finally, you can switch to nested prefabs anytime you want by clicking right arrow icon inside a hierarchy.
Take some time and check out prefab mode on your own.
Prefab variants
Another useful feature that will improve creating a project in Unity is prefab variants. Variants are another prefabs, based on some prefab. It is something similar to inheritance in programming. Variant prefab inherits from base prefab so every change on the base prefab will affect all variants that were created based on this prefab.
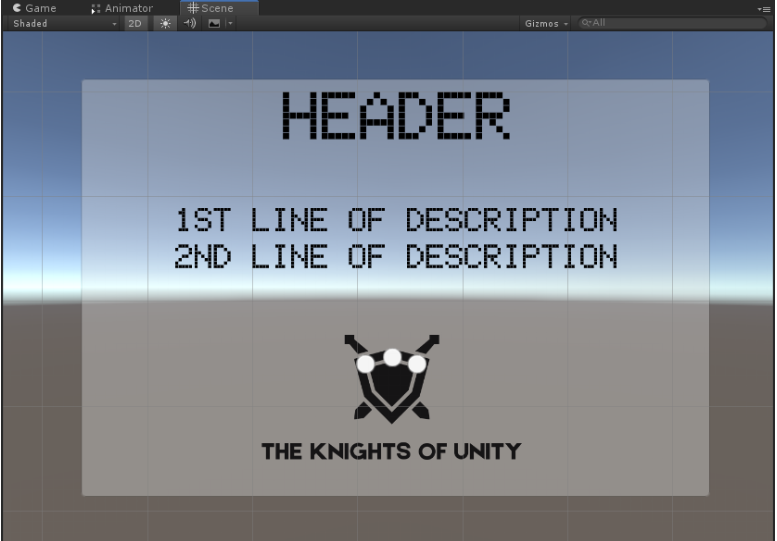
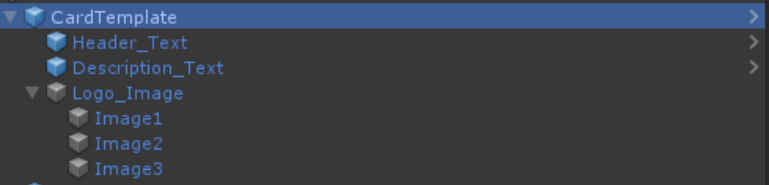
To create a variant, at first, you have to create prefab. Let’s prepare card prefab with some text and images:
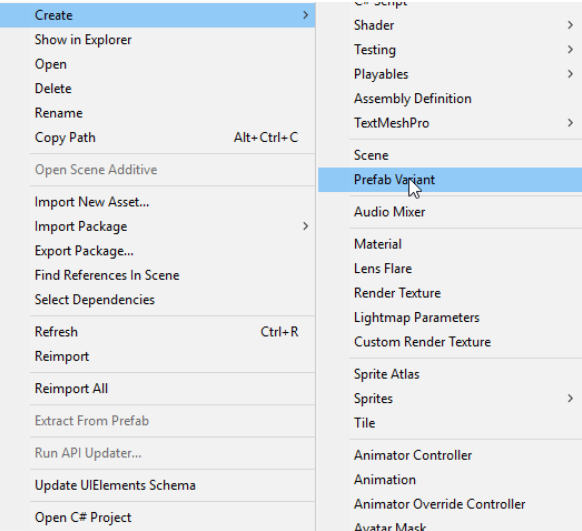
Then you can right-click on the prefab and choose to Create>Prefab Variant:
A created object will have a different icon so it can be easily recognized:
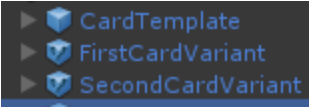
Variants are still prefabs so they can be used, edited in the same way as prefabs. They are fantastic to deal with multiple versions of the same object. For instance different classes of the same character or different versions of the same popup window.
Improved apply
Previously there was only an Apply button. It was overriding all changes in selected prefab. Sometimes it caused many problems in many objects in the scene because there were some unwanted changes. Now applying changes is much better. It is a little bit similar to GIT – it shows what changes were made to prefab. While applying changes, specific changes can be chosen.
To show changes, just click on the Override (the one that replaced Apply):
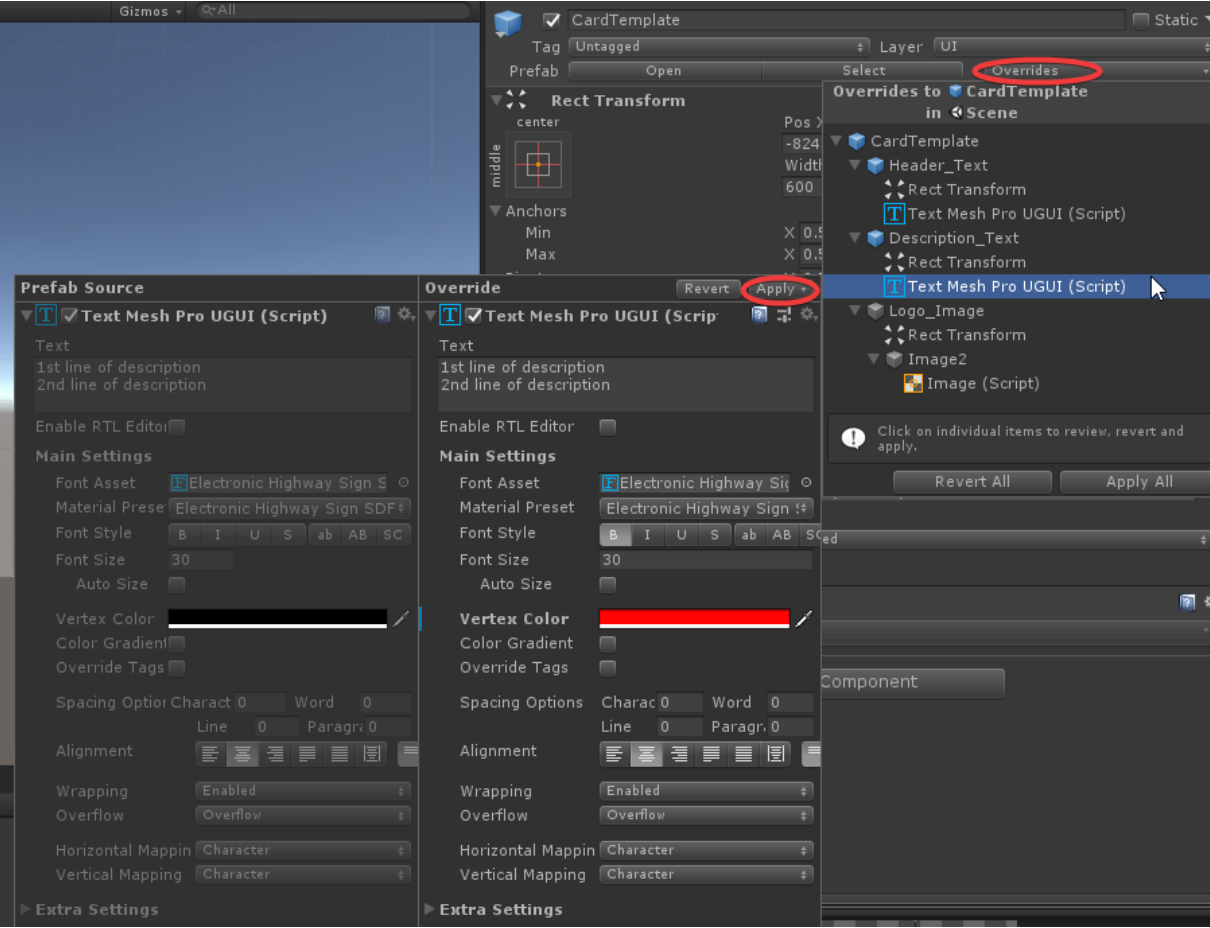
In the main window, it shows all changed components. To preview specific changes in specific component click on it and another window will show up. Changes to each component can be chosen separately but there is still an option Apply All.
An additional feature is applying changes to specific prefab. If some nested prefab was edited, changes can be applied to the edited one or to the parent one too. It can be chosen from a small menu that appears after clicking the Apply button:

Summary
Improved prefab workflow is something that everyone working in Unity wanted. Nested prefabs will improve work, especially in big projects. Prefab mode and improved applying can prevent many problems and provides an easier workflow with prefabs. Variants are programming inheritance which can work well with many similar objects. It should help with organization of many prefabs.
Don’t wait, just test these features as soon as possible!