Introduction
AR technology is getting more and more popular these days. Two big companies have their own implementation of it. Google has ARCore supporting devices with Android and Apple has ARKit for iOS. These technologies require high computing power so only newer devices are supported.
Both ARCore and ARKit have a feature to detect horizontal and vertical surfaces. Let’s check it out and do something interesting.
How about placing some cool object right in the corner of your room? Soon you will be able to do it with your phone!
Importing ARKit to Unity
First step is to create new project in Unity (in this tutorial version 2018.2.0f2 of Unity will be used) and import ARKit plugin. There are two ways to import it:
- Download plugin from asset store: https://assetstore.unity.com/packages/essentials/tutorial-projects/unity-arkit-plugin-92515
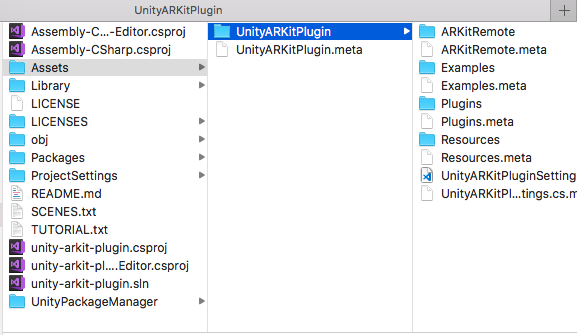
- Download plugin from official repository https://bitbucket.org/Unity-Technologies/unity-arkit-plugin and simply copy folder UnityARKitPlugin to your Unity project.

I would recommend using option 2. Thanks to using repository you will be up to date with all amendments and fixes.
Get started with UnityARKit Plugin
If this is your first time with UnityARKit Plugin I would recommend you to visit Unity blog site (https://blogs.unity3d.com/2018/02/16/developing-for-arkit-1-5-update-using-unity-arkit-plugin/) to make this start easier.
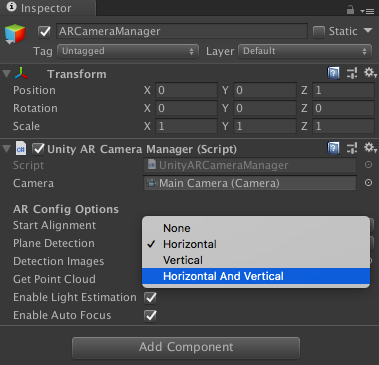
For quick start copy the scene EditorTestScene from UnityARKitPlugin/ARKitRemote folder. Then remove objects Cube and HitCubeParent. Now change important setting for ARCameraManager – change PlaneDetection to Horizontal and Vertical.
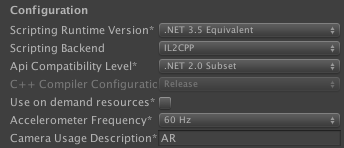
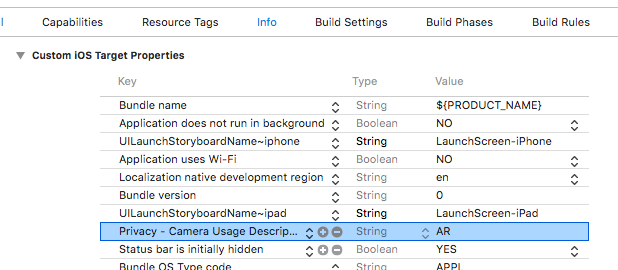
Now you can build the app and check out how ARKit works on the device. Before you start building, make sure you added CameraUsageDescription. You can do it in Unity Player Settings in Other Settings:
or later on in XCode in Project Info:

Detected surfaces
So you already have an application that recognizes surfaces. It works quite precisely on floor with carpeting or on walls with posters. Current technology cannot handle plain surface such as white walls. Then you can get some sheet of paper or poster and put it on the wall. This will help the app detect surfaces quickly and precisely.
Now let’s checkout how to handle data given by ARKit. Searching through the code of ARKitPlugin you can find methods that are responsible for spawning objects after detecting the surface.
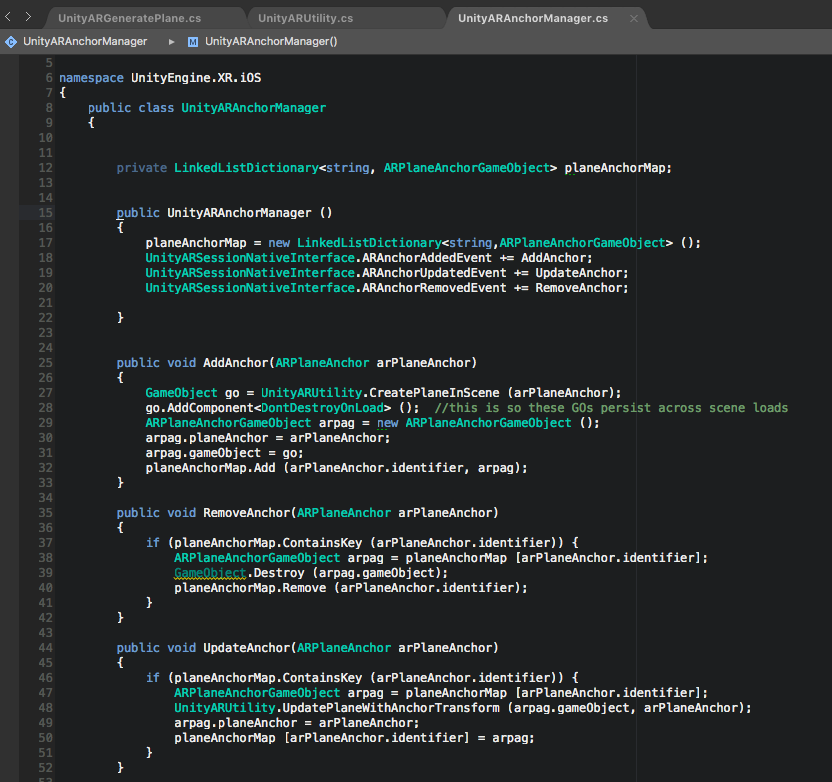
As you can see in code there are three events: ARAnchorAddedEvent, ARAnchorUpdatedEvent and ARAnchorRemovedEvent. We are interested the most in the first one.
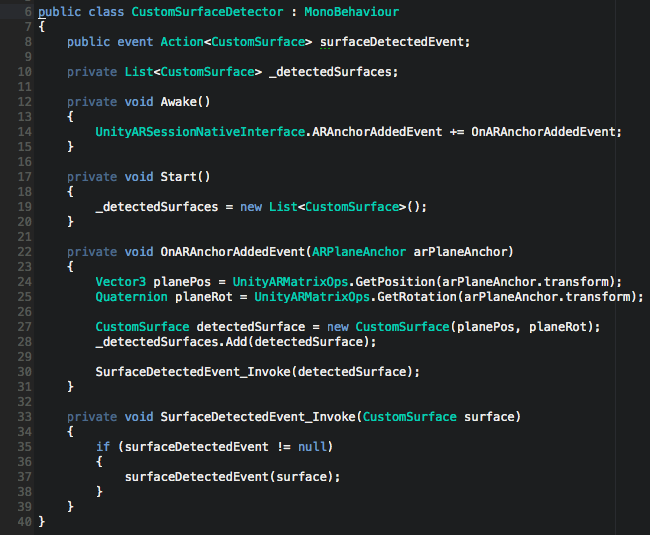
Now create simple script to handle data returning by ARKit Plugin. From class ARPlaneAnchor we can get position and rotation of detected surface. These two values will be useful in next steps.
Knowing rotation of each detected plane we can easily calculate rotation between surfaces and designate three perpendicular surfaces. Three perpendicular planes will always create a corner.
If the second surface is perpendicular to the first one then we have to find third one that is perpendicular both to first and second one. That will give us certainty that we are detecting a room corner.

Summary
Now you should know how to use ARKit to detect surfaces in your room using mobile app. You also know what data you can get from ARKit Plugin and how to use it.
For now you can display debug logs on screen about detected and perpendicular surfaces and check app if it works properly.

In the next part you will learn how to replace default game objects that ARKit Plugin is creating with your own objects with proper position and rotation. You will also learn how to move and rotate these object so they will look better for you to imagine how surfaces are placed in 3D space.