Deeper inside FSM
Finite State Machines are a sequential logic that are very low level. They can be used for simple decision-making logic. Let’s give a human example of an FSM:
- Input: Flips the switch
- State: Light Bulb is in the state of “On”
- Output: Light Bulb will now produce light for the room
Inputs are any form of stimulus from the user that can trigger a change of state based on the condition needed to perform that states. Think about switching a light on:
States as you can see, describes the current condition of the FSM. Until the user makes another input, the light bulb won’t change its state to “Off”.
Outputs are linked to the FSM’s state depending on how the FSM is programmed by the programmer.
FSM Implementation
This is my way of implementing a dynamic FSM in Unity. This will require us to have the main FSM class per object that holds the states; FSM State for the object that holds the actions; and FSM Actions that does the outputs of the state.
Now that we’ve introduced the FSM to you, let’s now do some scripting. Let’s do them one by one. First, let’s organize our unity project.
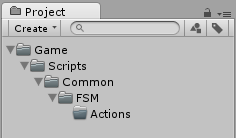 It’s up to you where to place them. I always separate my game-only-assets to other assets. We’re going to put this FSM in our common folder(I always have the “Common” folder because I have my own library that I use in every games) because this FSM system will be dynamic and you will be able to use everything to every games.
The reason why we have a folder for actions is to compile all the actions that we make, and create a library of actions for other kinds of games.
Let’s now create our main FSM class, and put it in the FSM folder under common, and let’s call it FSM.cs.
FSM.cs
using UnityEngine;
using System;
using System.Collections.Generic;

namespace Common.FSM
{
    ///<summary>
    ///This is the main engine of our FSM, without this, you won't be
    ///able to use FSM States and FSM Actions.
    ///</summary>
    public class FSM
    {
    }
}
Couple of things, I’m a namespace fanatic and it’s a great practice to segregate your codes if you’re not using any of them. Again, I have my Common library which is why I placed it under Common. You can create your own namespace if you want to.
As you can see, we’re not inheriting from MonoBehaviour class because we will have an update function that will be called under the AI’s update instead to update the FSM.
Now let’s make some variables and functions for our FSM.
private readonly string name;

public string Name {
	get {
		return name;
	}
}

///<summary>
/// This is the constructor that will initialize the FSM and give it
/// a unique name or id.
///</summary>
public FSM (string name) {
	this.name = name;
}

///<summary>
/// This initializes the FSM. We can indicate the starting State of
/// the Object that has an FSM.
///</summary>
public void Start()
{
}

///<summary>
/// This changes the state of the Object. This also calls the exit
/// state before doing the next state.
///</summary>
public void ChangeToState()
{
}

///<summary>
/// This changes the state of the Object. It is not advisable to
/// call this to change state.
///</summary>
public void EnterState()
{
}

private void ExitState()
{
}

///<summary>
/// Call this under a MonoBehaviour's Update.
///</summary>
public void Update()
{
}


///<summary>
/// This handles the events that is bound to a state and changes
/// the state.
///</summary>
public void SendEvent()
{
}
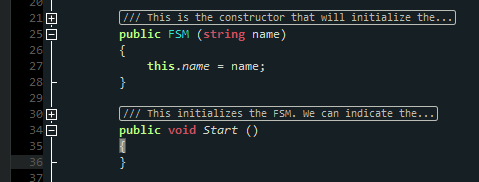
Just a tip, if you think that the code is starting to look dirty because of all the summary, just enable the code colding of monodevelop. Just go to Tools/Options/Text Editor/General, and check “Enable Code Folding”
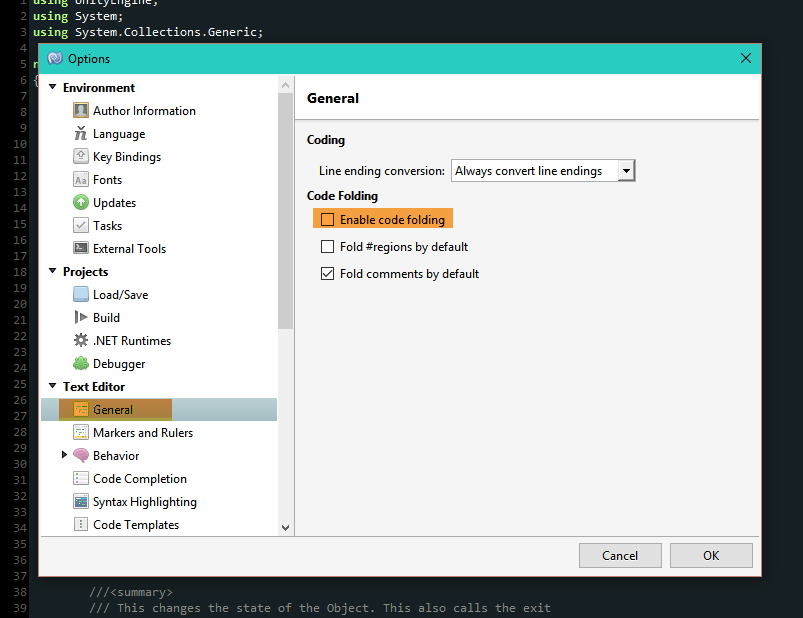
Now we can fold the summaries in the code itself.
Before we go any further, let’s create the FSMState, and FSMAction because we need to create functions in the FSM that will return them. Let’s start with the FSMAction.
FSM Action Impementation
FSMAction will be the base class of our actions, hence the virtual functions. If you’re not familiar with virtual functions, here’s a Unity Tutorial that talks about Polymorphism.
using UnityEngine;
using System.Collections;

namespace Common.FSM
{
	public class FSMAction
	{
		private readonly FSMState owner;

		public FSMAction (FSMState owner)
		{
			this.owner = owner;
		}

		public FSMState GetOwner ()
		{
			return owner;
		}

		///<summary>
		/// Starts the action.
		///</summary>
		public virtual void OnEnter ()
		{
		}

		///<summary>
		/// Updates the action.
		///</summary>
		public virtual void OnUpdate ()
		{
		}

		///<summary>
		/// Finishes the action.
		///</summary>
		public virtual void OnExit ()
		{
		}
	}
}
Initial FSM State Implementation
Let’s now start the FSMState and let’s call this FSMState.cs:
using UnityEngine;
using System;
using System.Collections.Generic;

namespace Common.FSM
{
	public class FSMState
	{
		private List<FSMAction> actions;

		/// <summary>
		/// Initializes a new instance of the <see cref="Common.FSM.FSMState"/> class.
		/// </summary>
		/// <param name="name">Name.</param>
		/// <param name="owner">Owner.</param>
		public FSMState (string name, FSM owner)
		{
		}

		/// <summary>
		/// Adds the transition.
		/// </summary>
		public void AddTransition (string id, FSMState destinationState)
		{
		}

		/// <summary>
		/// Gets the transition.
		/// </summary>
		public FSMState GetTransition (string eventId)
		{
		}

		/// <summary>
		/// Adds the action.
		/// </summary>
		public void AddAction (FSMAction action)
		{
		}

		/// <summary>
		/// This gets the actions of this state
		/// </summary>
		/// <returns>The actions.</returns>
		public IEnumerable<FSMAction> GetActions ()
		{
			return actions;
		}

		/// <summary>
		/// Sends the event.
		/// </summary>
		public void SendEvent (string eventId)
		{
		}
	}
}
Now that we’ve started on everything, let’s finish up the FSM class.
Finishing FSM Implementation
Let’s add the ff variables in our class.
private readonly string name;
private FSMState currentState;
private readonly Dictionary<string, FSMState> stateMap;
The name of course will be the name of the FSM. The stateMap will contain a key which will be the event id of the FSMState, and the FSMState itself so that we could bind them together, and transition to another state via SendEvent() function.
public string Name {
	get {
		return name;
	}
}
Of course the name of the FSM.
private delegate void StateActionProcessor (FSMAction action);

/// <summary>
/// This gets all the actions that is inside the state and loop them.
/// </summary>
/// <param name="state">State.</param>
/// <param name="actionProcessor">Action processor.</param>
private void ProcessStateAction (FSMState state, StateActionProcessor actionProcessor)
{
	FSMState currentStateOnInvoke = this.currentState;
	IEnumerable<FSMAction> actions = state.GetActions ();

	foreach (FSMAction action in actions) {
		if (this.currentState != currentStateOnInvoke) {
			break;
		}

		actionProcessor (action);
	}
}
We will create an action processor. This will enable us to dynamically call different actions that is inside the state, and do the action. If you’re not familiar with delegates, refer to this.
Let’s now fill up the constructor that we did before and make an initializer for our FSM.
///<summary>
/// This is the constructor that will initialize the FSM and give it
/// a unique name or id.
///</summary>
public FSM (string name)
{
	this.name = name;
	this.currentState = null;
	stateMap = new Dictionary<string, FSMState> ();
}

///<summary>
/// This initializes the FSM. We can indicate the starting State of
/// the Object that has an FSM.
///</summary>
public void Start (string stateName)
{
	if (!stateMap.ContainsKey (stateName)) {
		Debug.LogWarning ("The FSM doesn't contain: " + stateName);
		return;
	}

	ChangeToState (stateMap [stateName]);
}
Constructors as you know, makes creating instances of classes easier and much more clean, and less coupled since the variables of this class are set to private. Keeping unnecessary variables unseen for the other programmers.
We will now add a FSMState parameter to ChangeToState(), EnterState(), and ExitState()
///<summary>
/// This changes the state of the Object. This also calls the exit
/// state before doing the next state.
///</summary>
public void ChangeToState (FSMState state)
{
	if (this.currentState != null) {
		ExitState (this.currentState);
	}

	this.currentState = state;
	EnterState (this.currentState);
}
Now it’s important to check the states to avoid jumbling them and avoid errors.
Enter, Exit, and Update will be the same and will be handled by our action processor.
///<summary>
/// This changes the state of the Object. It is not advisable to
/// call this to change state.
///</summary>
public void EnterState (FSMState state)
{
	ProcessStateAction (state, delegate(FSMAction action) {
		action.OnEnter ();
	});
}

private void ExitState (FSMState state)
{
	FSMState currentStateOnInvoke = this.currentState;

	ProcessStateAction (state, delegate(FSMAction action) {

		if (this.currentState != currentStateOnInvoke)
			Debug.LogError ("State cannont be changed on exit of the specified state");

		action.OnExit ();
	});
}

///<summary>
/// Call this under a MonoBehaviour's Update.
///</summary>
public void Update ()
{
	if (this.currentState == null)
		return;

	ProcessStateAction (this.currentState, delegate(FSMAction action) {
		action.OnUpdate ();
	});
}
Finishing FSM State Implementation
Now that we’ve created our loop. Let’s start writing our FSMState. First its constructor.
public FSMState (string name, FSM owner)
{
	this.name = name;
	this.owner = owner;
	this.transitionMap = new Dictionary<string, FSMState> ();
	this.actions = new List<FSMAction> ();
}
Before we go any further, let’s talk about transitions. Transitions by its name, is the change between two states. We’ll use a string to act as a key to change between states. All of these are contained in a dictionary.
/// <summary>
/// Adds the transition.
/// </summary>
public void AddTransition (string id, FSMState destinationState)
{
	if (transitionMap.ContainsKey (id)) {
		Debug.LogError (string.Format ("state {0} already contains transition for {1}", this.name, id));
		return;
	}

	transitionMap [id] = destinationState;
}

/// <summary>
/// Gets the transition.
/// </summary>
public FSMState GetTransition (string eventId)
{
	if (transitionMap.ContainsKey (eventId)) {
		return transitionMap [eventId];
	}

	return null;
}
Now let’s make a function that adds actions to our state.
/// <summary>
/// Adds the action.
/// </summary>
public void AddAction (FSMAction action)
{
	if (actions.Contains (action)) {
		Debug.LogWarning ("This state already contains " + action);
		return;
	}

	if (action.GetOwner () != this) {
		Debug.LogWarning ("This state doesn't own " + action);
	}

	actions.Add (action);
}
Let’s now add the event handlers for the FSM, and the FSMState. Let’s first go back to the FSM.cs and add new functions to the class.
///<summary>
/// This handles the events that is bound to a state and changes
/// the state.
///</summary>
public void SendEvent (string eventId)
{
	FSMState transitonState = ResolveTransition (eventId);

	if (transitonState == null)
		Debug.LogWarning ("The current state has no transition for event " + eventId);
	else
		ChangeToState (transitonState);

}

/// <summary>
/// This gets the next state from the current state.
/// </summary>
/// <returns>The transition.</returns>
/// <param name="eventId">Event identifier.</param>
private FSMState ResolveTransition (string eventId)
{
	FSMState transitionState = this.currentState.GetTransition (eventId);

	if (transitionState == null)
		return null;
	else
		return transitionState;
}
Let’s finalize the FSMState by adding implementations for event handling.
public void SendEvent (string eventId)
{
	this.owner.SendEvent (eventId);
}
Lastly, let’s create a function that will automatically create states for us under FSM.cs.
public FSMState AddState (string name)
{
	if (stateMap.ContainsKey (name)) {
		Debug.LogWarning ("The FSM already contains: " + name);
		return null;
	}

	FSMState newState = new FSMState (name, this);
	stateMap [name] = newState;
	return newState;
}
By calling this function, this will enable us to create States without creating on the AI class itself.
So there you have it. Our FSM system is now done. Look out for our next Blog tutorial for the implementation. Please do comment if you have questions regarding this topic.
On the next and final part of this tutorial, we will make two kinds of implementations for this FSM engine that we made. We will create one AI class that will write to our console indefinitely, and another AI that will move AND write to our console indefinitely.