From what I observe, many Unity users do not grasp the concept of using multiple Unity cameras on a single scene. “If I want to look from only one perspective, why do I need more than one camera?”. Saying that it makes perfect sense when more than one camera captures the scene from the same perspective makes it even more confusing. So why even bother? The reason is somewhat complex, but it’s really worth learning. It will help you create great visual effects, that are hard to accomplish with the use of only one camera, in an easy way.
What is the Unity camera?
Before we can continue, you have to understand what Unity Camera actually is. When Unity renders the scene it needs much of important information to be set up, but let’s simplify that list to make it easier to understand. Let’s consider:
- List of objects to render
- Camera’s perspective (position, rotation, scale, field of view, clipping etc.)
If you’re already experienced in that matter you might’ve noticed that I’m not speaking about matrices. Let’s just ignore math-related stuff for now.
List of objects to render is a list of all objects on the scene, right? Wrong! Each camera renders only the objects visible to it (field of view, frustum culling) and those on the layer which actually seen by the camera (Culling Mask.)
![]()
Culling Mask can be set to Everything, or you may set which of the layers should be seen. This is one thing what layers are for.
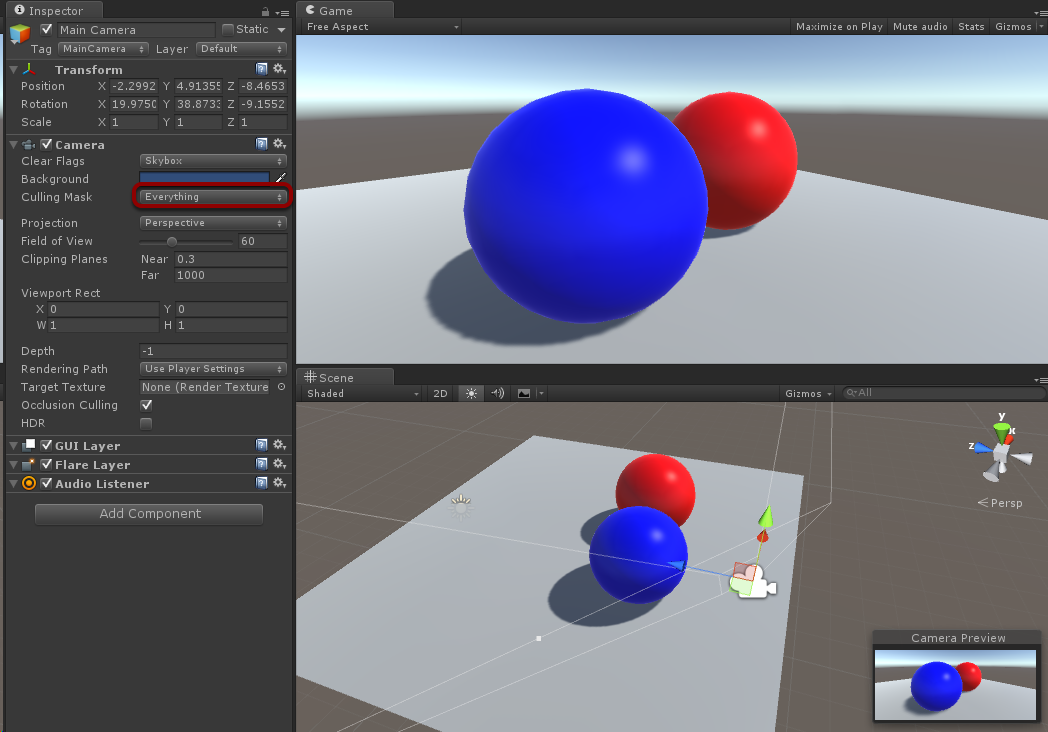
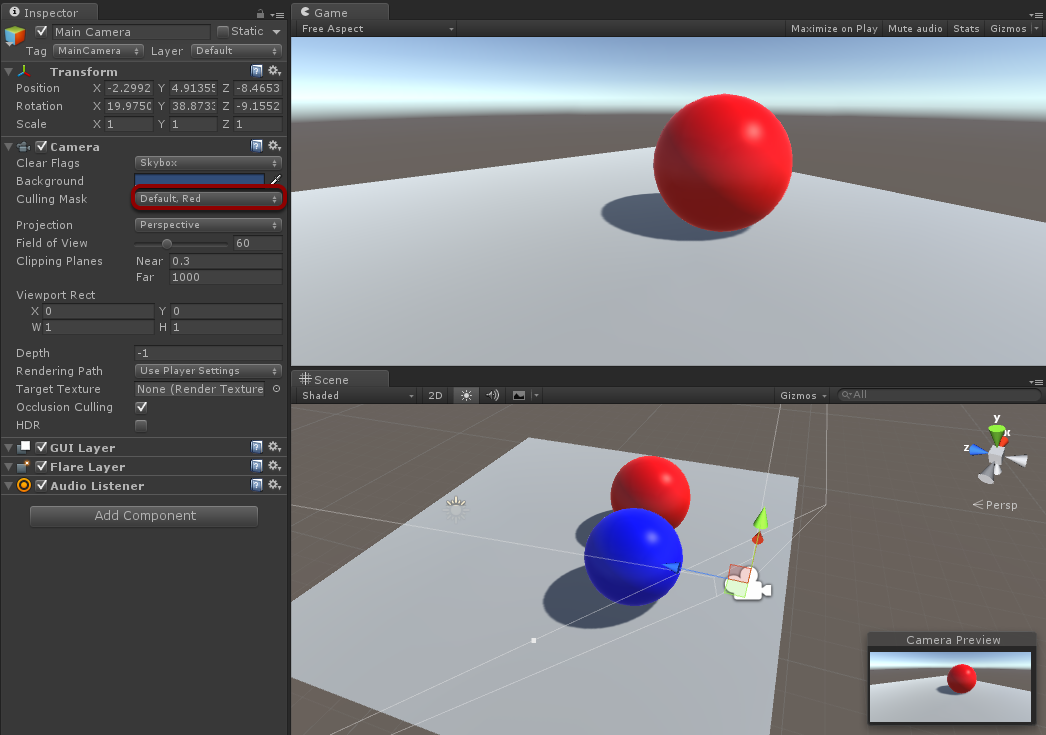
The conclusion is that different cameras can render different objects. This is important information even if you don’t know yet how to use it in practice. It also means that adding second camera will not re-draw your scene two times. Only objects visible to the second camera will be rendered. Knowing this having multiple cameras rendering different layers will result in similar efficiency as rendering all these layers using only one camera.
Let’s then answer the main question: Camera is an instruction to render specific list of objects from given perspective.
What do cameras render?
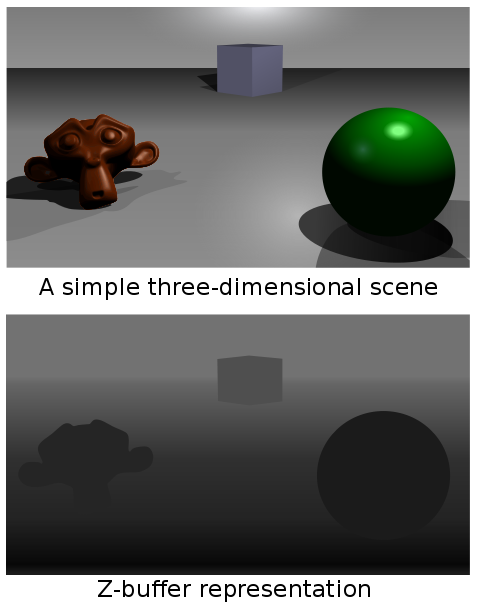
Wait, haven’t we just answered that question?! Well… not exactly. There’s a visible and an invisible part. What you can see is a result image (let’s call it color buffer). And of course there’s a thing that you cannot see. This thing is called a depth buffer (called also z-buffer).
Depth buffer can be easily described as a game screen sized gray-scale image, every pixel of which represents how close that pixel is to the camera (to be honest this is not 100% true but let’s not think of more complicated cases now.) It is used by the GPU to decide whether to-be-rendered pixel should be processed or rejected from rendering. As a result, pixels that are obstructed by other pixels are not going to be visible (just like in the real world.)
Camera order and clearing
Before rendering anything into color buffer and depth buffer, camera can clear both buffers or only the depth buffer. Did you notice that the default Unity 5 scene camera clears buffers to Skybox?
![]()
There are some more options there:
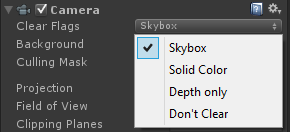
- Skybox replaces color buffer with your skybox and completely clear depth buffer
- Solid color does the same, but color buffer becomes solid color
- Depth only leaves color buffer at is, but your depth buffer becomes clear
- Don’t Clear doesn’t clear anything.
What will happen if we will try to set the default camera Clear Flags to Don’t Clear? Well, the effect may be interesting (I moved the camera a little after entering the Play mode).
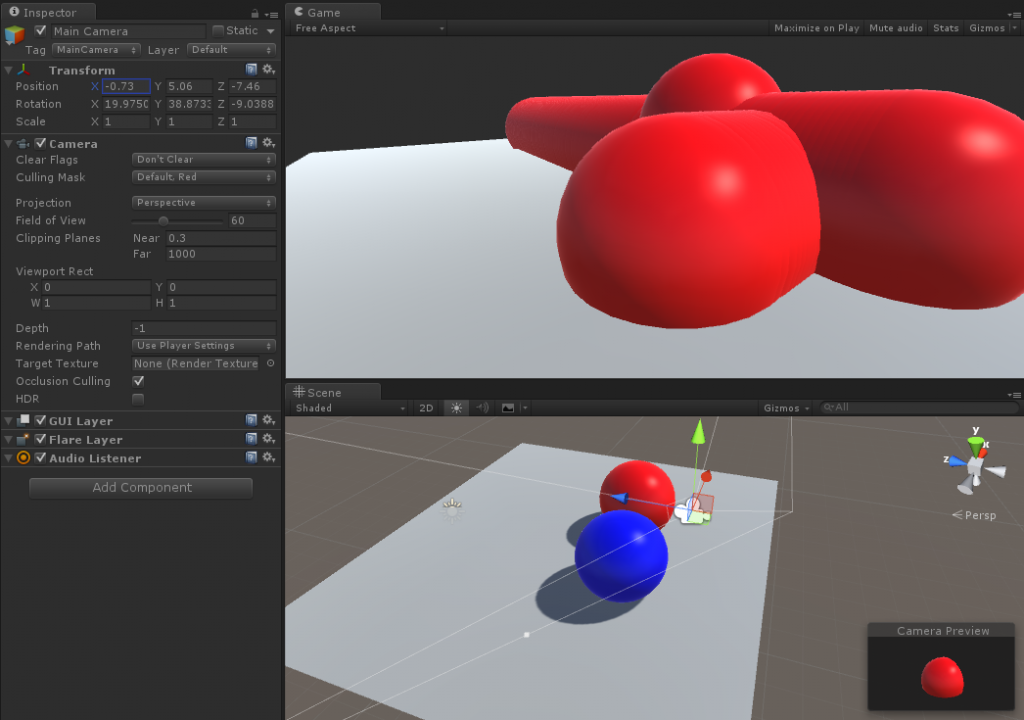
It looks like our sphere duplicated itself so many times, that it turned into some kind of wired, rounded pipes thing. Besides that there’s still one red sphere on the scene (note that Blue layer is still not visible to the camera), the game scene image looks valid. There are no graphical artifacts of any kind. Yet we managed to create an effect of many duplicated objects with only one object.
This happened because color buffer was not cleared between frames (colors rendered previously were transferred to the next frame), also the depth buffer. Depth buffer remembered that something has been rendered and it was keeping this information when Unity tried to render another frame. When sphere was about to be rendered behind already rendered sphere image, invisible pixels were discarded. The same thing applies when there are many objects on the scene rendering one after another.
If you still don’t understand what just happened, please stop reading now and try doing it yourself! Make a new scene, add an object, set camera Clear Flags to Don’t Clear and move either your object or your camera.
What is it good for?
I assume that you don’t want this kind of effect in your game, so what’s the clearing good for? Let’s now try to create two cameras.
- Blue Camera
- Clear Flags: Skybox
- Culling Mask: Default, Blue
- Depth: 0

- Red Camera
- Clear Flags: Don’t Clear
- Culling Mask: Red
- Depth: 1
There’s one new parameter: Depth. Depth defines the order of rendering of the cameras. Camera with lower depth will be rendered before the camera with a higher depth.
Let’s see how Unity will render this scene step by step (again not 100% accurate, but it’s only to understand the process):
- (Blue Camera context)
- Color buffer is cleared to Skybox
- Depth buffer is cleared
- Plane (Default layer) and blue sphere (Blue layer) are rendered
- (Rex Camera context)
- Nothing is cleared
- Red sphere (Red layer) is rendered
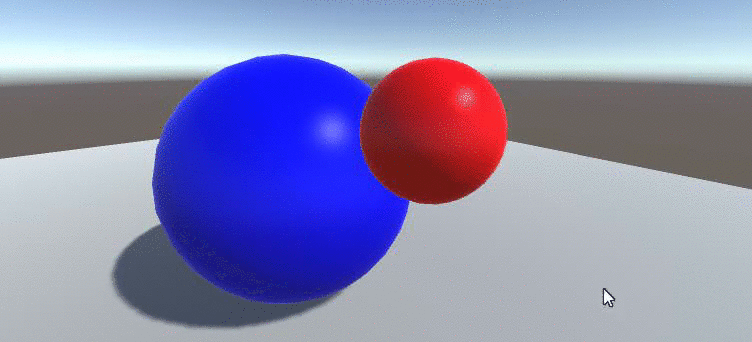
As the result you get a scene that looks exactly like rendered using a single camera:

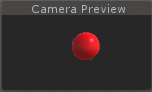
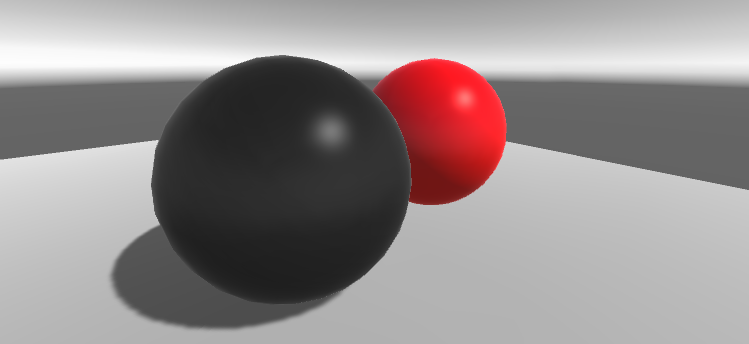
So why bother? Let’s try one thing. Let’s switch Red Camera Clear Flags from Don’t Clear to Depth only:

Whoa, do you see that? Since depth buffer has been cleared, the red sphere doesn’t know that its pixels are obstructed, so it’s rendering like there’s nothing on the scene. That means that clearing the depth buffer brings rendered objects to the front. This may be super-useful when you’d like to render 3D UI elements.
Another interesting option is applying camera effects only to specific layers. Let’s try to apply blur to the Blue Camera, just like on the screenshot below:

Let’s now switch Red Camera Clear Flags back to Don’t Clear and apply a different effect to the Blue Camera: Grayscale.
Finally, keep in mind that if you want to move the camera, you may want to move all cameras at once (that’s why keeping all the cameras as a child of one game object is quite common.) But moving only one camera may be somewhat desired…