Things you can do better in Unity!
How many times you’ve been bored or annoyed because of some stuff you had to do over and over again? Probably countless… But fear no more!
Bill Gates once said “I choose a lazy person to do a hard job. Because a lazy person will find an easy way to do it.”.
And you might ask why even I’m bringing this quote here? It’s because I am going to make you lazy in a good way… 😉
Let’s get it started
The main reason we came up with idea for that list is the fact that we (as humans) are lazy by design and we don’t like to repeat ourselves in our daily tasks. As a result, we came up with tools and tricks that we use to make our life easier and we hope to make it easier also for you!
So here are top 10 things you can do better in Unity:
1. Change your play mode editor color!
How many times you’ve been tweaking your game to be in this one perfect spot? And all of a sudden you realized that you just clicked on pause button and lost all of those changes? Of course this is how Unity works, but how many times you forgot about it? Probably not only once. 😉
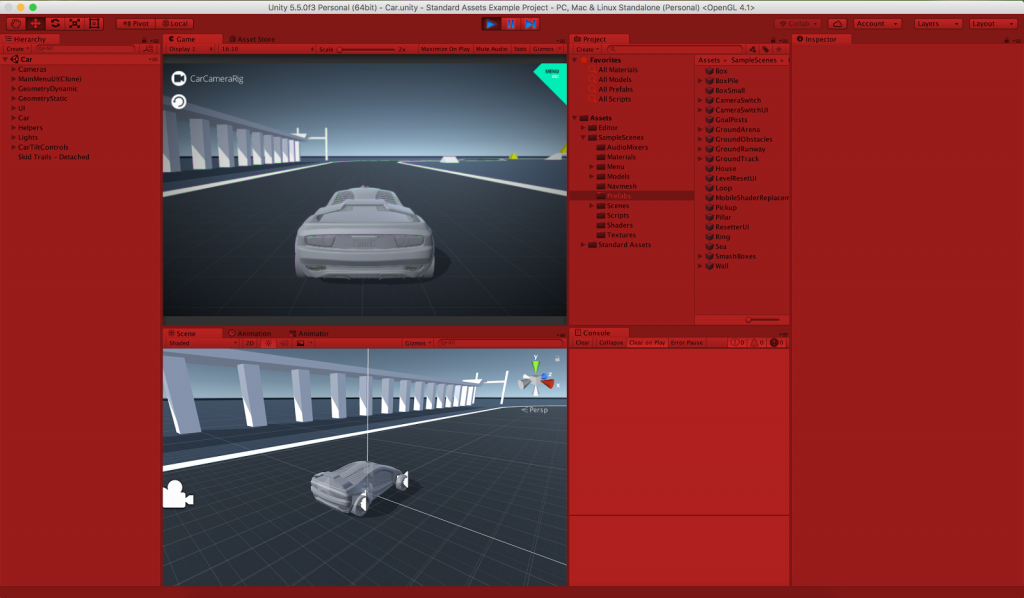
So the simplest solution to remind you that you’re in the play mode is to change editor’s play mode color! To do so, just go to Unity > Preferences > Colors and change your Playmode tint color to something more vivid.
Results?
2. Let the code write itself
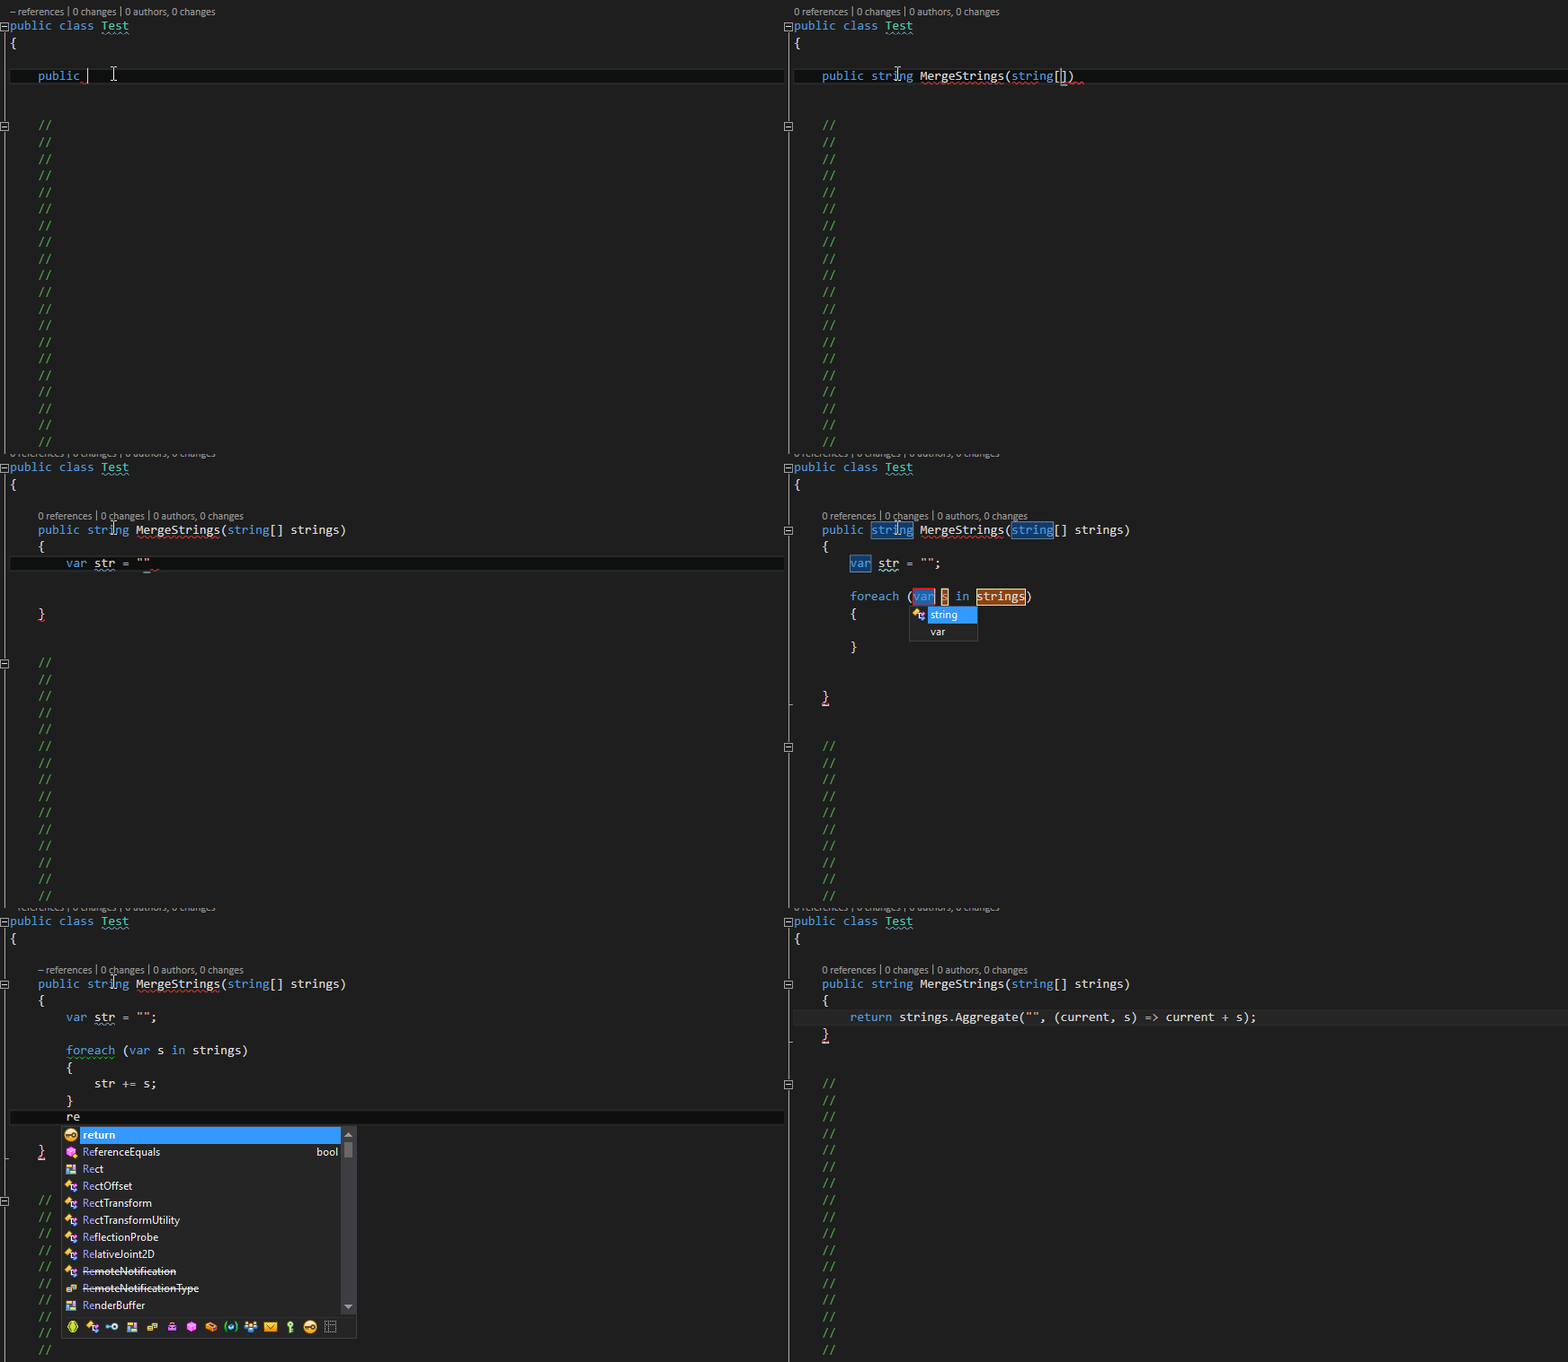
There are many tools that can extend your IDE and give you just a little bit of support for your programming skills. One of such extensions is JetBrains ReSharper which is so useful that you probably won’t want to program anything without it.
This tool analyzes the code for you. This tool writes the code for you. This tool finds bugs for you. THIS TOOL EVEN FIX THOSE BUGS FOR YOU! Maybe not all of them, but it fixes the typical ones without any problems 😉 If you are programmer then you should definitely check it out.
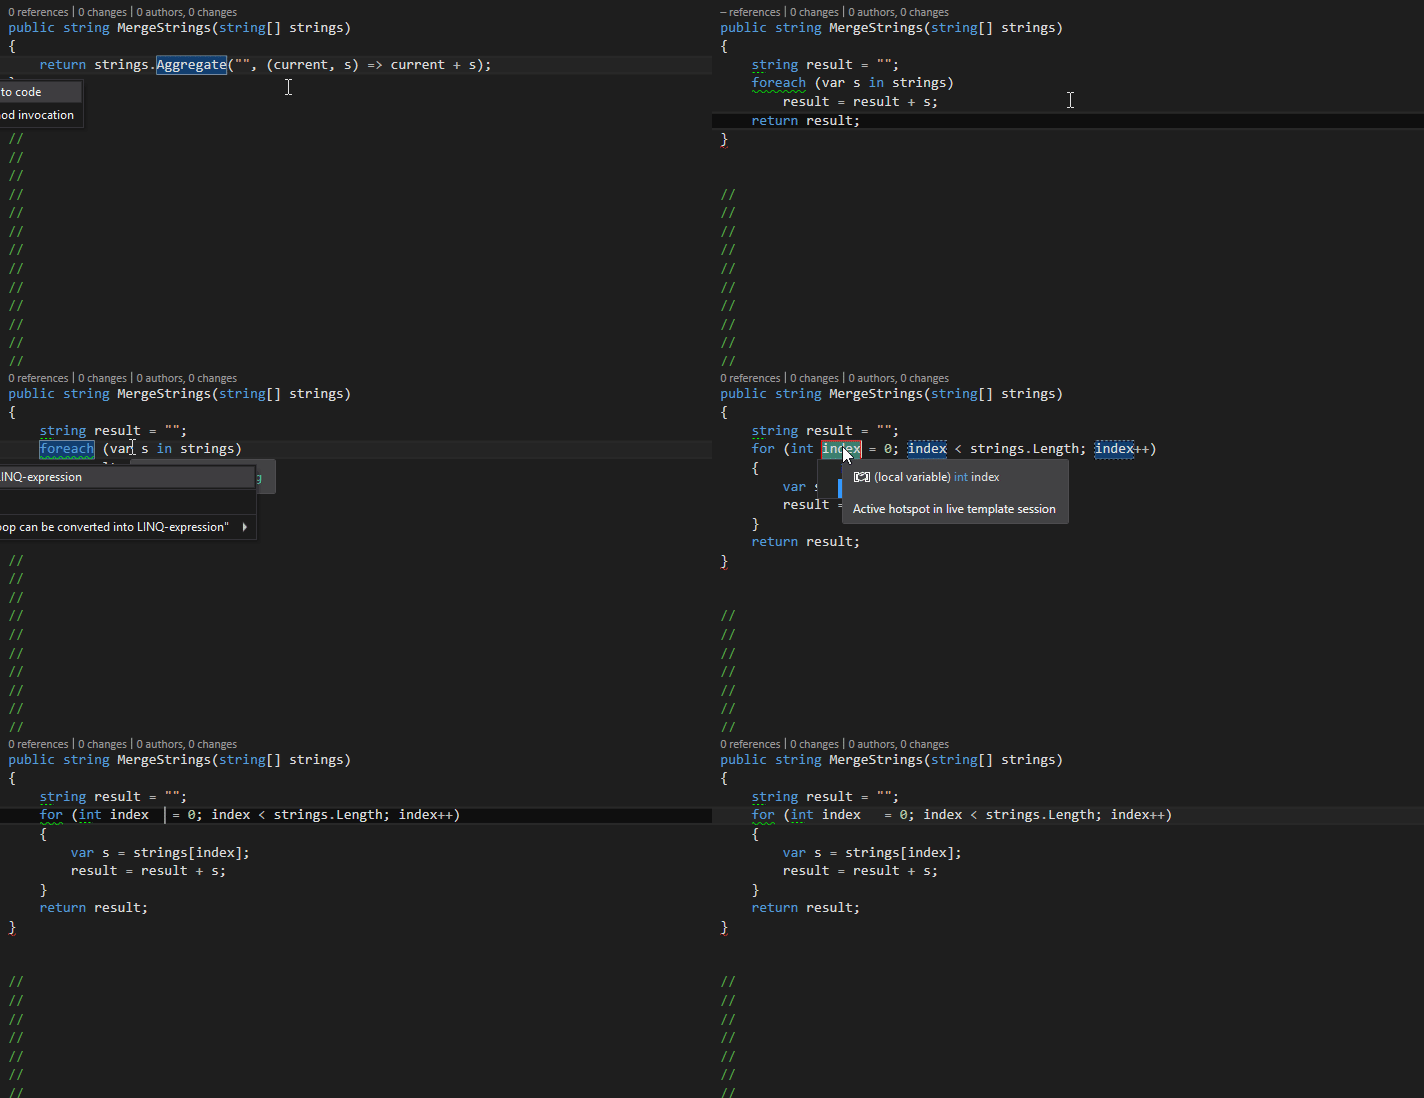
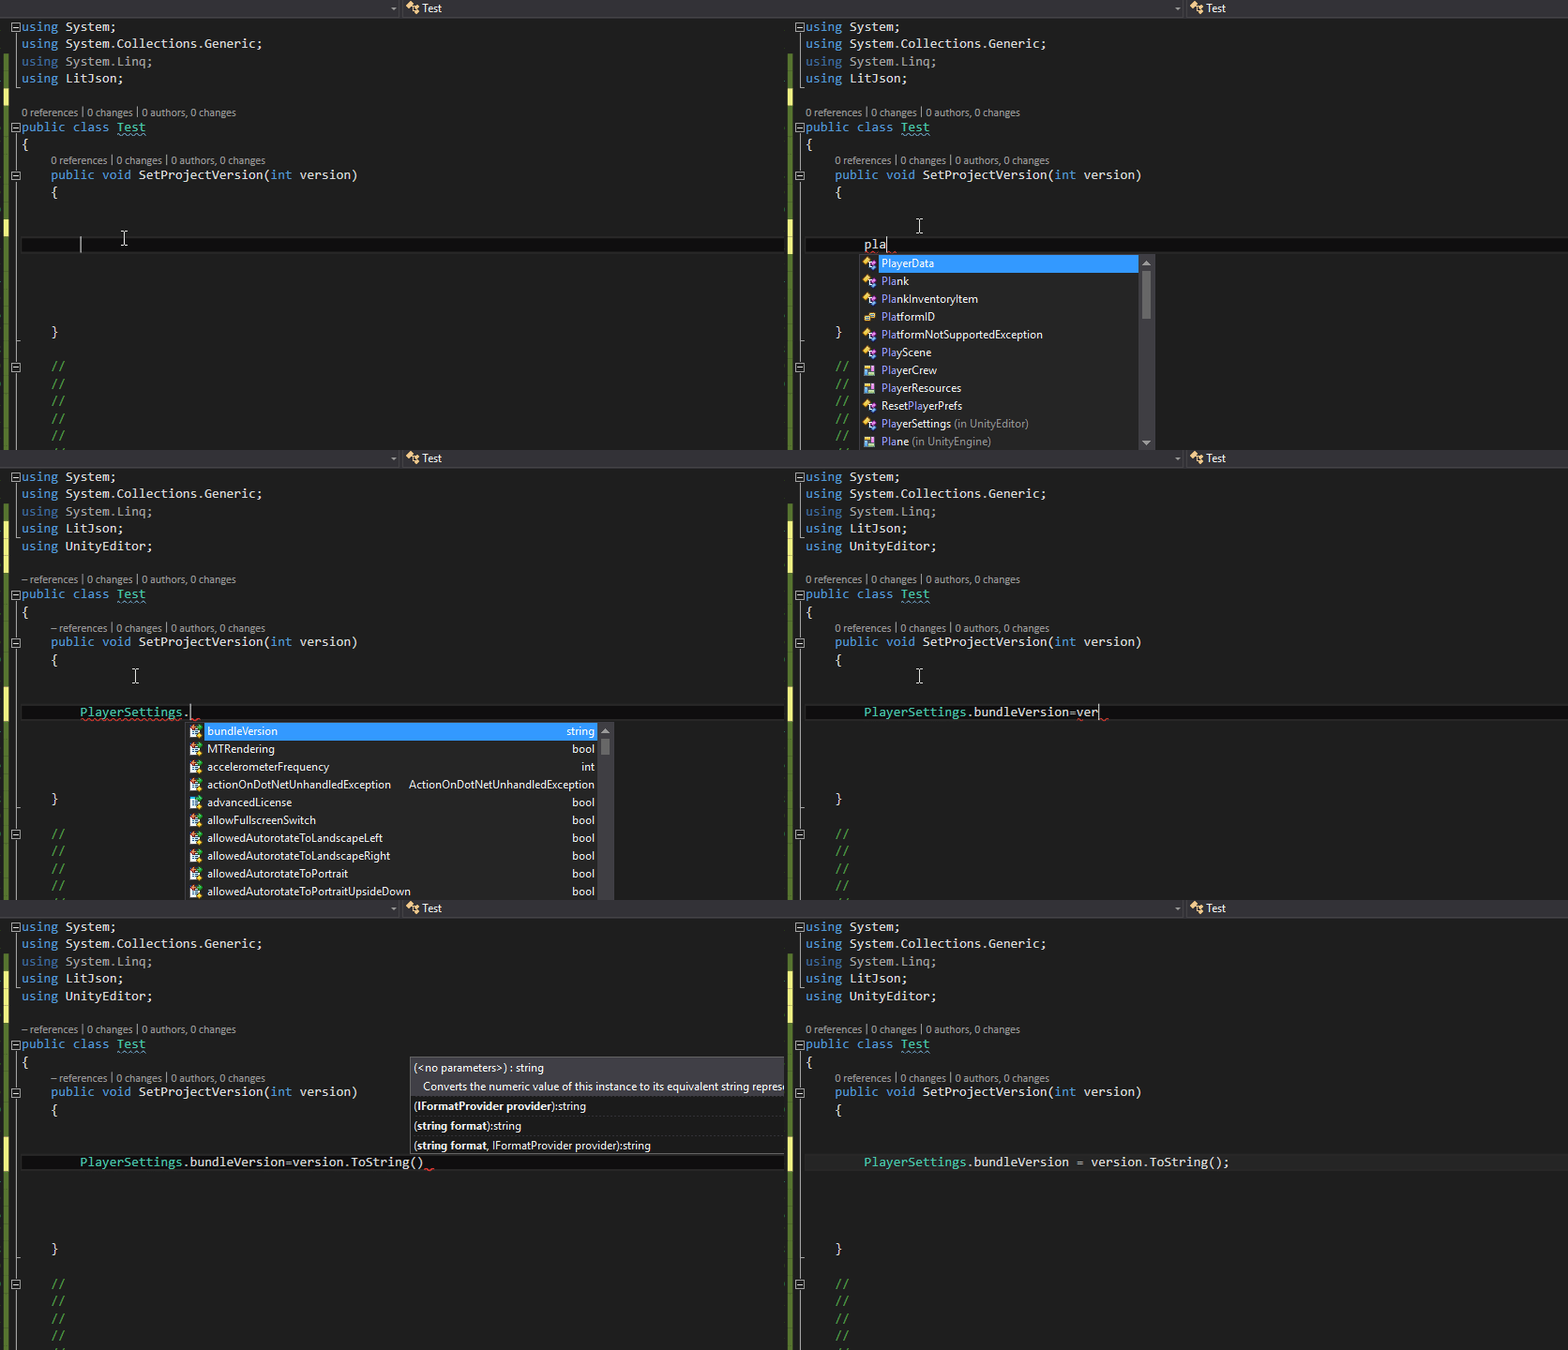
Here are some examples:
- Converting code to Linq:
- Converting code from Linq:
- Adding missing usings:
- Generating methods:
Home page of ReSharper: https://www.jetbrains.com/resharper/
3. Optimize your build pipeline
When you’re developing your next very best app or game you are probably making a lot of builds per day. Each build can take up a few minutes or even an hour to make. This is bad especially because it’s impeding your work till the build is finished.
So let’s count the time you waste because of that process. Let’s say that your project is medium sized and need ~20 minutes to build on Android and ~1 hour to build on iOS. And you’re making 1 build per day at minimum. Now let’s sum up the time it takes to make those builds in one month (20 work days): Android builds – at least 6h 40m. iOS builds – at least 40h. This is more time than it took first spacecraft (Luna 1) to make flyby of the Moon in 1959! Which took only 36h! But how to save so much of your time? Use external tool to make those builds for you!
For a long time, the most popular one was Jenkins, which offers you a lot of flexibility. Also, it’s giving you basically unlimited possibility to configure your build pipeline to suit your needs, for example:
- Watch repository for new commits.
- Analyze code.
- Make a build.
- When finished, send build file to a FTP server.
- Send mail with a build report and a link to build file.
Of course there are a lot more options, and if you ever need more, then you can always add some. Oh, and I almost forgot! It’s available for free! So you just need to go to their website, download it and install it on your build machine 😉
More about Jenkins: https://jenkins.io
The other tool is provided by Unity itself and it’s called Unity Cloud Builds. It of course assures better integration with editor, where you can basically configure everything you need to start using it. Like Jenkins, it is also available for free, but with Unity subscription your builds will be higher in priority list and will be processed faster. Additionally, after each build Unity generates the link to your build to download or to share with your friends 😉
More about Unity Cloud Builds: https://unity3d.com/services/cloud-build
So what are differences between these two? Jenkins is open-sourced and has a huge library of plugins to install. You can for example integrate 3rd party APIs like Slack with it. Jenkins also allows you to configure it any way you like it and give you a possibility of setting up your own build pipeline. On the other hand, Unity Cloud is only focused around Unity and you can’t add anything to it. Of course you can configure Slack to get notifications from Cloud or use Webhooks that Unity provides, but that’s it. But the advantage is that it is straightforward, easy to configure and use.
Which one should you use? If you need something simple, then go with Unity Cloud Builds. If you need something more advanced, with a lot of configuration options, then go with Jenkins.
4. Store your data in convenient way
Many people put the data into objects on a scene or hardcode it somewhere else. With that approach it’s often hard to find where you have to make a change in order to achieve a desired result later in development…
But we’re here to present you two better ways to store data:
- Text Asset, which can be JSON, Excel file or any other text format. The problematic aspect of it is that in such file you can put only text, and you need to have a parser to read this file and get your data.
- The other and more convenient way is to create ScriptableObject. You can put there anything you like. Text, numbers, textures, material, models, etc. And most important thing is that you can use it like any other asset in your project and reading data from it is as easy as getting a variable.
Here is an example of ScriptableObject code:
using UnityEngine;

[CreateAssetMenu(fileName = "NewWeapon", menuName = "Weapon")]
public class WeaponData : ScriptableObject
{
   public string displayName;
   public float damage;
   public float reloadTime;
}
And with that code you can easily create as many WeaponData objects as you want 😉
5. Auto references
Creating UI is not the most pleasant thing to do, mostly because you have many scripts, that need even more references, which you have to assign by hand. Wouldn’t it be great to have all of these references filled all by themselves?
Of course! Here is a sample implementation for that:
using System.Linq;
using UnityEngine;

public class AutoReferencer<T> : MonoBehaviour where T : AutoReferencer<T> {

   #if UNITY_EDITOR
   // This method is called once when we add component do game object
   protected new virtual void Reset()
   {
       // Magic of reflection
       // For each field in your class/component we are looking only for those that are empty/null
       foreach (var field in typeof(T).GetFields().Where(field => field.GetValue(this) == null))
       {
           // Now we are looking for object (self or child) that have same name as a field
           Transform obj;
           if (transform.name == field.Name)
           {
               obj = transform;
           }
           else
           {
               obj = transform.Find(field.Name); // Or you need to implement recursion to looking into deeper childs
           }

           // If we find object that have same name as field we are trying to get component that will be in type of a field and assign it
           if (obj!=null)
           {
               field.SetValue(this, obj.GetComponent(field.FieldType));
           }
       }
   }
   #endif
}
Here is class example of use of that implementation:
using UnityEngine;
using UnityEngine.UI;

public class DialogWindow : AutoReferencer<DialogWindow> {
   public Text DialogLabel;
   public Button ConfirmButton;
}
Here is how it looks in Unity:
These references were added automatically! 😉
Summary
So, here’re 5 tips that hopefully can help you exclude a chore part from the Unity development process and boost your productivity. I’ll be adding more tips like that in the next part, so stay tuned!
You can also subscribe to our newsletter, so you won’t miss our posts in the future!

