Finite State Machines might be something that all developers might have heard at least once in their few years starting game development in Unity.
What is a Finite State Machine anyway? Well, there is a lot to cover that is why we’re going to do at least 3 parts. Basically, a Finite State Machine (or FSM) is a design pattern where automation comes in play. Commonly used in AI implementations for certain behaviours. Ie: Walking, Attacking, Idling, etc. FSM can be also implemented in NPCs and is most common in Open World RPGs.
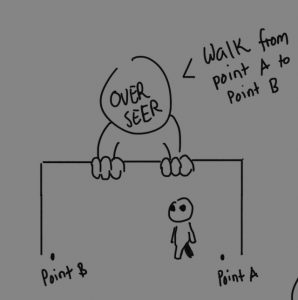 Let’s treat FSM as an overseer:
Now, the overseer checks the state of an AI. Depending on the state, the AI will react on it. Also, depending on the type of an AI (whether it is a flying type, or ground type, or swimming type) is the action that the AI will make. In this scenario, FSM tells the AI that he is in the “Patrol State”, and will tell the AI to “Walk from A to B”. Unless that there’s a change in state, the AI will only walk from A to B.
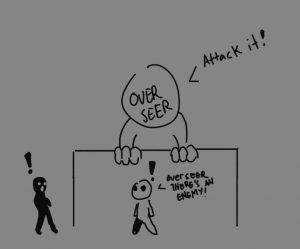
To change state, first we must have a condition. In the image on the left, the AI sees the player, and tells the overseer. Now the overseer will change the AI’s state, and will start attacking.
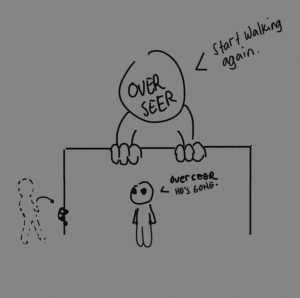 Again, the AI starts to patrol again since the player is not in his line of sight.
As seen in these poorly made drawings, every state has their conditions before changing to other states.
Let’s look at the diagram below.
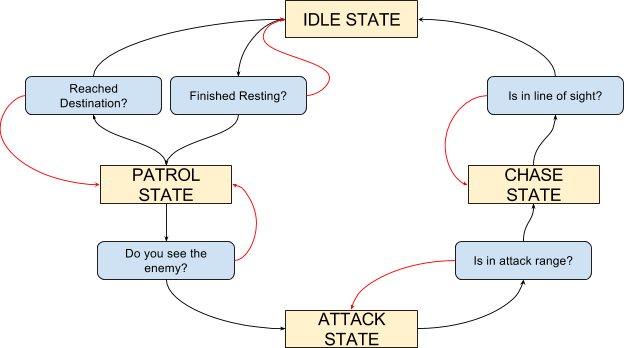
Here is a diagram of states of a normal AI. Red lines represents false on the condition that is required to change in state. The diagram is pretty straight forward. The AI will be on Idle State if it reaches its destination, and vice versa. If he sees an enemy, it will start to attack. The FSM now handles all transitions between states and helps the AI do the action that is available for that state.
Now let’s break down our FSM System.
- Main FSM System – This is will be the one who will control the AI’s states and checks if the conditions between states. The Main FSM will contain all the states, and will handle the event calls from the FSM Actions.
- FSM State – This determines the current state of the AI and contains all the actions that is placed on the AI.
- FSM Action – This will be the action that the AI will do when the AI is in a specific state.
Now how will we do it? Let’s map everything out.
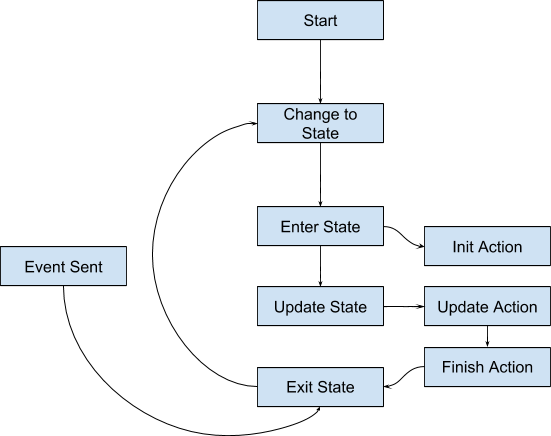
This will be the loop of our FSM. First we initialize the FSM, create states, create actions, and map them all together. After we have mapped them, we will now start the FSM and indicate the state that the AI will start to. Now, the AI will change to a specific state, and the FSM will initialize the action, update it until it the action finishes and sends an event indicating that the action is finished. Finally, the FSM will go back and change the state.
Another thing that will cause a change of state is when an event is called outside the AI’s logic. Like when we create a commander and tells all the soldiers to stop moving.
This ends the first part of our FSM tutorial. I hope that I’ve explained FSM well to you. If you still don’t get it, probably you’ll need to see everything in action first, and see scan everything for yourself. That’s how I learned it.
On the next part, we will first discuss again some simple real life FSM implementations, and we will start scripting our whole FSM Engine from scratch!
